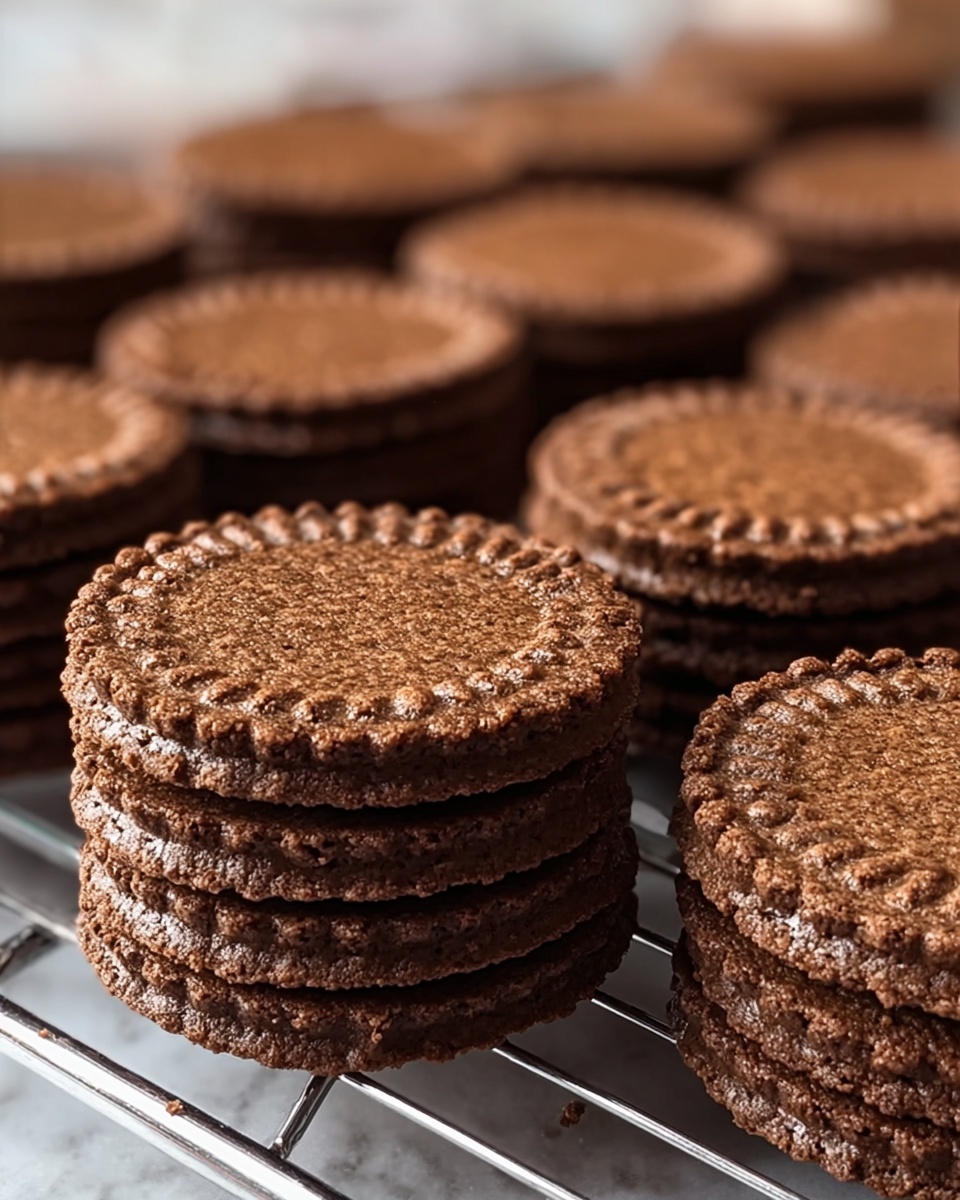
If you have a soft spot for rich, chocolatey treats, this Dutch Cocoa Cookies Recipe is guaranteed to become one of your all-time favorites. These cookies are just the right balance of fudgy cocoa and buttery sweetness, delivering a melt-in-your-mouth experience with every bite. Made with Dutch-process cocoa, these cookies boast a deep, complex chocolate flavor that ordinary cocoa powders simply can’t match. Whether you’re baking for a crowd or just craving a decadent snack, this recipe hits the sweet spot every time and keeps things delightfully simple in the kitchen.
Ingredients You’ll Need
The beauty of this Dutch Cocoa Cookies Recipe lies in its straightforward, wholesome ingredients. Each one plays a crucial role—from giving the dough structure and that perfect chewy texture to enhancing the cookie’s rich chocolate flavor and adding a touch of sweetness that never overwhelms.
- All-purpose flour: Provides the sturdy base for tender yet chewy cookies.
- Dutch-process cocoa powder: Gives the cookies a smooth, deep chocolate flavor and a lovely dark color.
- Baking soda: Helps the cookies rise beautifully and become wonderfully soft.
- Salt: Balances the sweetness and enhances the chocolate taste.
- Unsalted butter, softened: Adds richness and a melt-in-your-mouth texture.
- Granulated sugar: Brings sweetness and helps with the cookie’s slight crispiness on the edges.
- Brown sugar, packed: Adds moisture and a subtle caramel note.
- Large egg: Binds everything together and adds a bit of lift.
- Pure vanilla extract: Enhances all the flavors and adds warmth.
- Chocolate chips (optional): For extra pockets of molten chocolate goodness.
How to Make Dutch Cocoa Cookies Recipe
Step 1: Prepare Your Oven and Baking Sheet
Start by preheating your oven to 350°F (175°C) so it’s perfectly hot when your cookies are ready to bake. Line a baking sheet with parchment paper—this simple step helps the cookies bake evenly and prevents sticking, making cleanup a breeze.
Step 2: Mix the Dry Ingredients
In a medium bowl, whisk together the flour, Dutch-process cocoa powder, baking soda, and salt. This ensures every cookie gets that rich chocolate flavor and a perfect rise, with no clumps of any ingredient messing up the texture.
Step 3: Cream the Butter and Sugars
In a large mixing bowl, cream the softened butter with the granulated and brown sugars until the mixture is light and fluffy. This takes a few minutes by hand or with a mixer—it’s a key step for creating those tender, melt-away bites.
Step 4: Add the Egg and Vanilla
Whisk in the egg and vanilla extract until everything is blended beautifully. These additions add moisture and that little something extra that makes the cookies so irresistible.
Step 5: Combine Dry and Wet Ingredients
Gradually add your dry ingredient mix to the wet mixture. Stir just until combined—overmixing can make the cookies tough, and we want them soft and tender.
Step 6: Fold in Chocolate Chips
If you’re feeling indulgent, fold in the chocolate chips for gooey bursts of additional chocolate. This step is optional but highly recommended to take your Dutch Cocoa Cookies Recipe up a notch.
Step 7: Portion the Dough
Scoop rounded tablespoonfuls of dough onto your prepared baking sheet, spacing them about two inches apart. This gives the cookies room to spread and achieve that perfect chewy edge with a soft center.
Step 8: Bake to Perfection
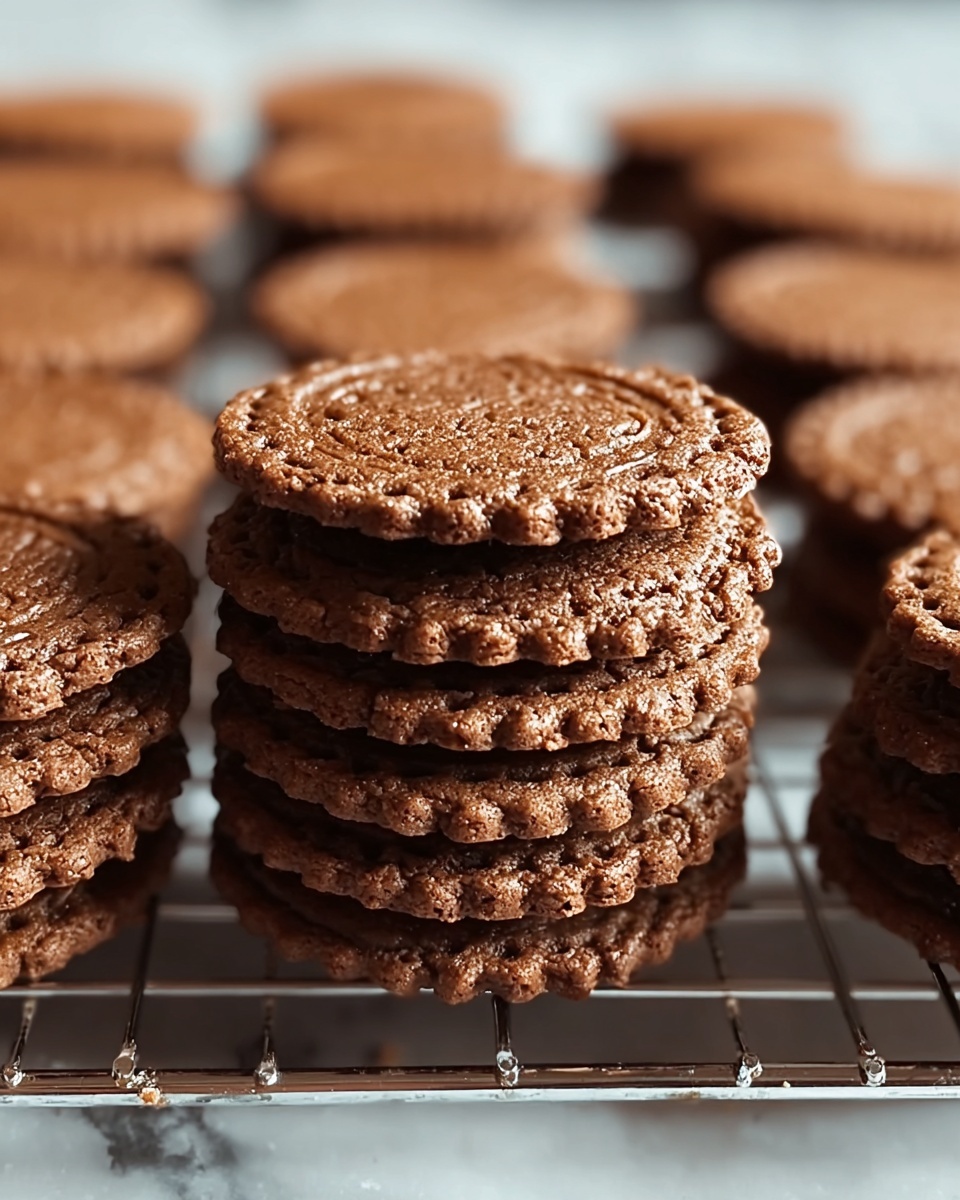
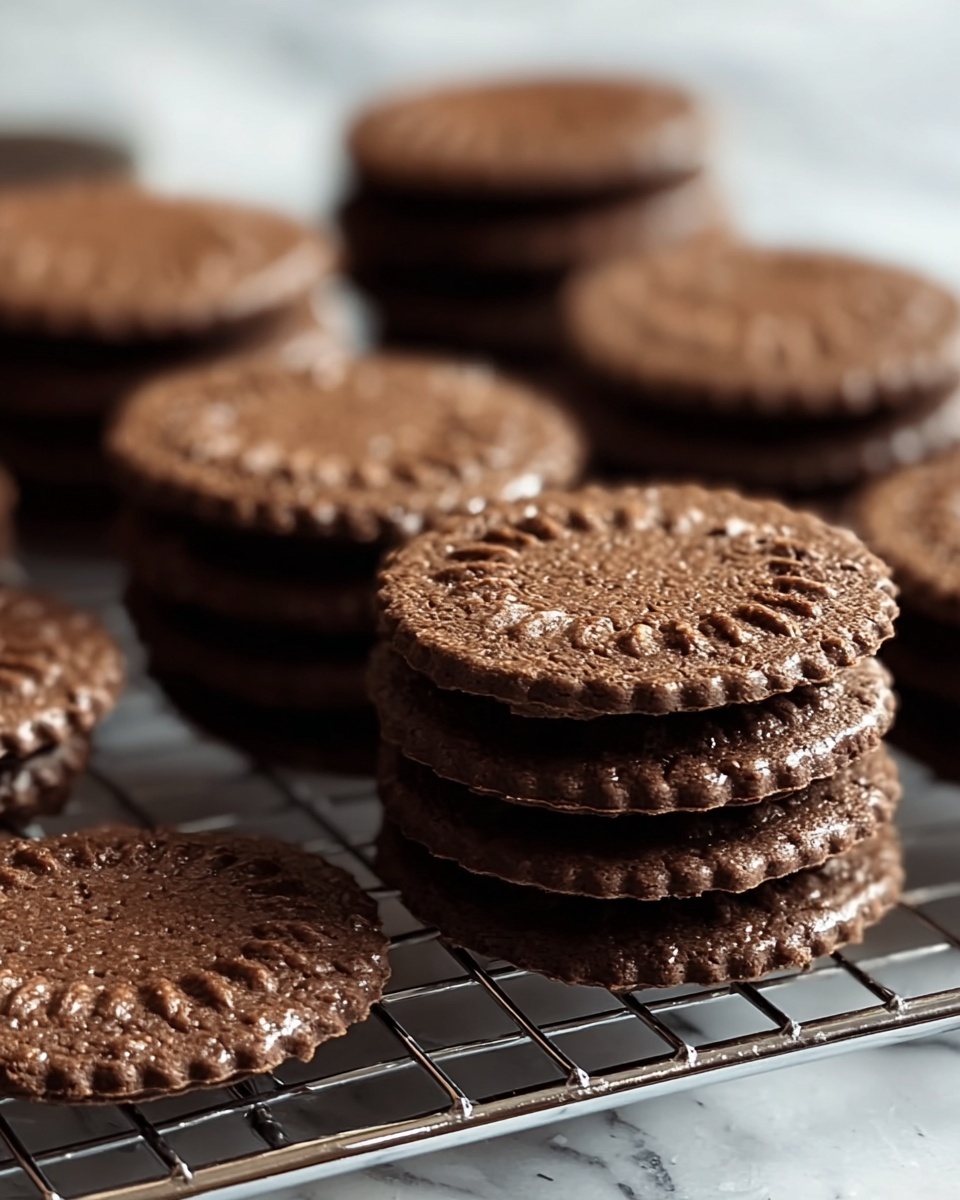
Bake for 8 to 10 minutes, keeping an eye so the edges are just set but the centers remain soft. This is the magic moment where the cookies reach that amazing fudgy texture you’ll crave again and again.
Step 9: Cool Before Serving
Let the cookies rest on the baking sheet for a few minutes before transferring them to a wire rack. This subtle cooling time helps them firm up perfectly without losing that chewiness in the middle.
How to Serve Dutch Cocoa Cookies Recipe
Garnishes
A simple dusting of powdered sugar or a light drizzle of melted white chocolate can transform these cookies from everyday treats to a beautiful plate of indulgence. Sprinkling a few flaky sea salt crystals over the tops right after baking adds a lovely contrast that makes each bite unforgettable.
Side Dishes
Pair these cookies with a glass of cold milk for a classic combo, or serve alongside a scoop of vanilla or coffee ice cream for an indulgent dessert. A cup of freshly brewed coffee or a warm chai latte also complements the deep cocoa flavor perfectly, making your snack time feel extra cozy.
Creative Ways to Present
Want to impress guests? Arrange these Dutch Cocoa Cookies on a tiered dessert tray with fresh raspberries or mint leaves for a pop of color. Alternatively, sandwich two cookies together with a dollop of whipped cream or peanut butter for a fun twist everyone will love.
Make Ahead and Storage
Storing Leftovers
Store your leftover Dutch Cocoa Cookies in an airtight container at room temperature for up to five days. This keeps them fresh and chewy, ready whenever sweet cravings strike.
Freezing
You can freeze baked cookies or cookie dough balls. For the dough, freeze on a baking sheet first, then transfer to a freezer bag; this way, you can bake fresh cookies whenever you want. Baked cookies should be wrapped tightly and frozen for up to three months without losing flavor or texture.
Reheating
Warm leftover cookies in a microwave for 10 to 15 seconds or in a low oven for a few minutes. This refreshes their soft texture and revives that just-baked feeling we all adore.
FAQs
What makes Dutch-process cocoa different from natural cocoa?
Dutch-process cocoa is treated with an alkalizing agent to neutralize its acidity, giving it a smoother, less bitter flavor and a darker color, which creates a richer taste in your cookies.
Can I substitute regular cocoa powder?
While you can substitute natural cocoa powder, the flavor and color will be different. Dutch-process cocoa offers a deeper, mellow chocolate taste that is signature to this recipe.
Why are my cookies hard after baking?
Overbaking or using too much flour can make cookies hard. Make sure to bake them just until the edges are set and the centers are soft, then let them cool properly.
Can I add nuts or other mix-ins?
Absolutely! Chopped walnuts, pecans, or dried cherries can be added to enhance texture and flavor. Just fold them in during the step where you add chocolate chips.
How do I prevent cookies from spreading too much?
Make sure your butter is not too melted when mixing, and chilling the dough for 15–30 minutes before baking can help control spreading, resulting in thicker cookies.
Final Thoughts
There’s just something incredibly comforting about baking a batch of these Dutch Cocoa Cookies Recipe, and sharing them with loved ones makes it even sweeter. With simple ingredients and easy steps, you get cookies that deliver intense chocolate goodness and a perfect balance of chewiness and softness. Give this recipe a try—you might find yourself going back to it again and again for a truly delicious treat.
Print
Dutch Cocoa Cookies Recipe
- Prep Time: 10 minutes
- Cook Time: 10 minutes
- Total Time: 20 minutes
- Yield: 24 cookies
- Category: Dessert
- Method: Baking
- Cuisine: American
Description
These Dutch Cocoa Cookies are rich, chocolatey treats made with Dutch-process cocoa powder for an intense cocoa flavor. Soft and chewy with optional chocolate chips for added indulgence, these cookies are perfect for any chocolate lover looking for an easy, classic homemade cookie recipe.
Ingredients
Dry Ingredients
- 1 cup all-purpose flour
- 1/2 cup Dutch-process cocoa powder
- 1/2 teaspoon baking soda
- 1/4 teaspoon salt
Wet Ingredients
- 1/2 cup unsalted butter, softened
- 3/4 cup granulated sugar
- 1/4 cup brown sugar, packed
- 1 large egg
- 1 teaspoon pure vanilla extract
Optional
- 1/2 cup chocolate chips
Instructions
- Preheat Oven: Preheat the oven to 350°F (175°C) and line a baking sheet with parchment paper to prevent sticking and ensure even baking.
- Mix Dry Ingredients: In a medium bowl, whisk together the all-purpose flour, Dutch-process cocoa powder, baking soda, and salt. This ensures even distribution of leavening agents and cocoa for consistent flavor.
- Cream Butter and Sugars: In a separate large bowl, cream the softened unsalted butter with granulated sugar and brown sugar until the mixture is light and fluffy, incorporating air for a tender cookie texture.
- Add Egg and Vanilla: Beat in the large egg and pure vanilla extract until fully combined, which helps bind the dough and adds flavor depth.
- Combine Wet and Dry: Gradually mix the dry ingredients into the butter mixture until just combined, avoiding overmixing to maintain cookie tenderness.
- Fold in Chocolate Chips: If desired, gently fold in the chocolate chips to distribute them evenly throughout the dough for extra bursts of chocolate.
- Shape Cookies: Drop rounded tablespoonfuls of dough onto the prepared baking sheet, spacing them about 2 inches apart to allow for spreading during baking.
- Bake: Bake in the preheated oven for 8–10 minutes, or until the edges are set but the centers remain soft, ensuring chewy texture.
- Cool: Let the cookies cool on the baking sheet for a few minutes to firm up before transferring them to a wire rack to cool completely, which prevents breaking.
Notes
- Use Dutch-process cocoa powder for a richer, smoother chocolate taste compared to natural cocoa.
- Ensure butter is softened (not melted) for proper creaming with sugars.
- For crispier cookies, bake a minute or two longer; for softer cookies, err on the shorter baking time.
- Chocolate chips are optional but enhance the texture and flavor beautifully.
- Store cookies in an airtight container at room temperature for up to one week.


