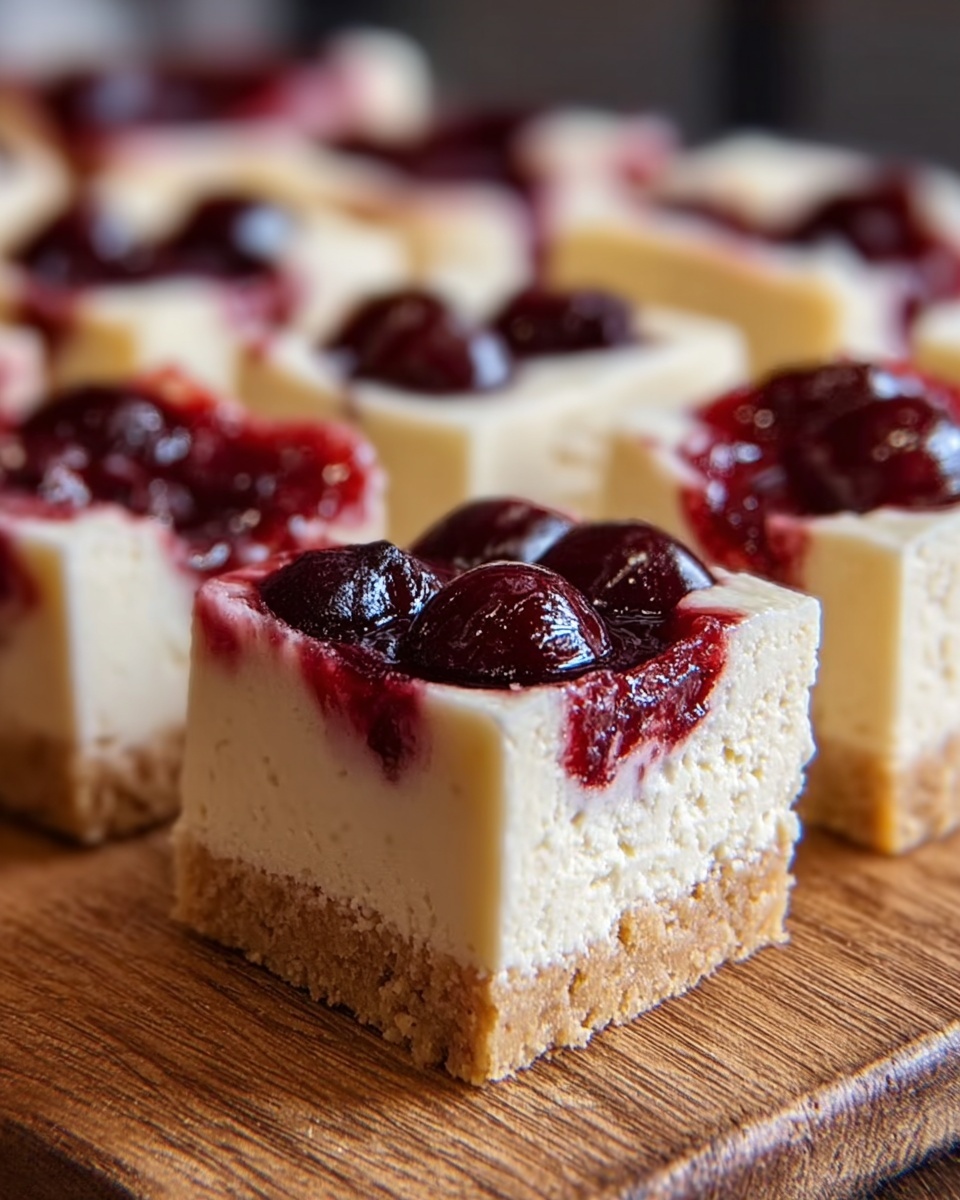
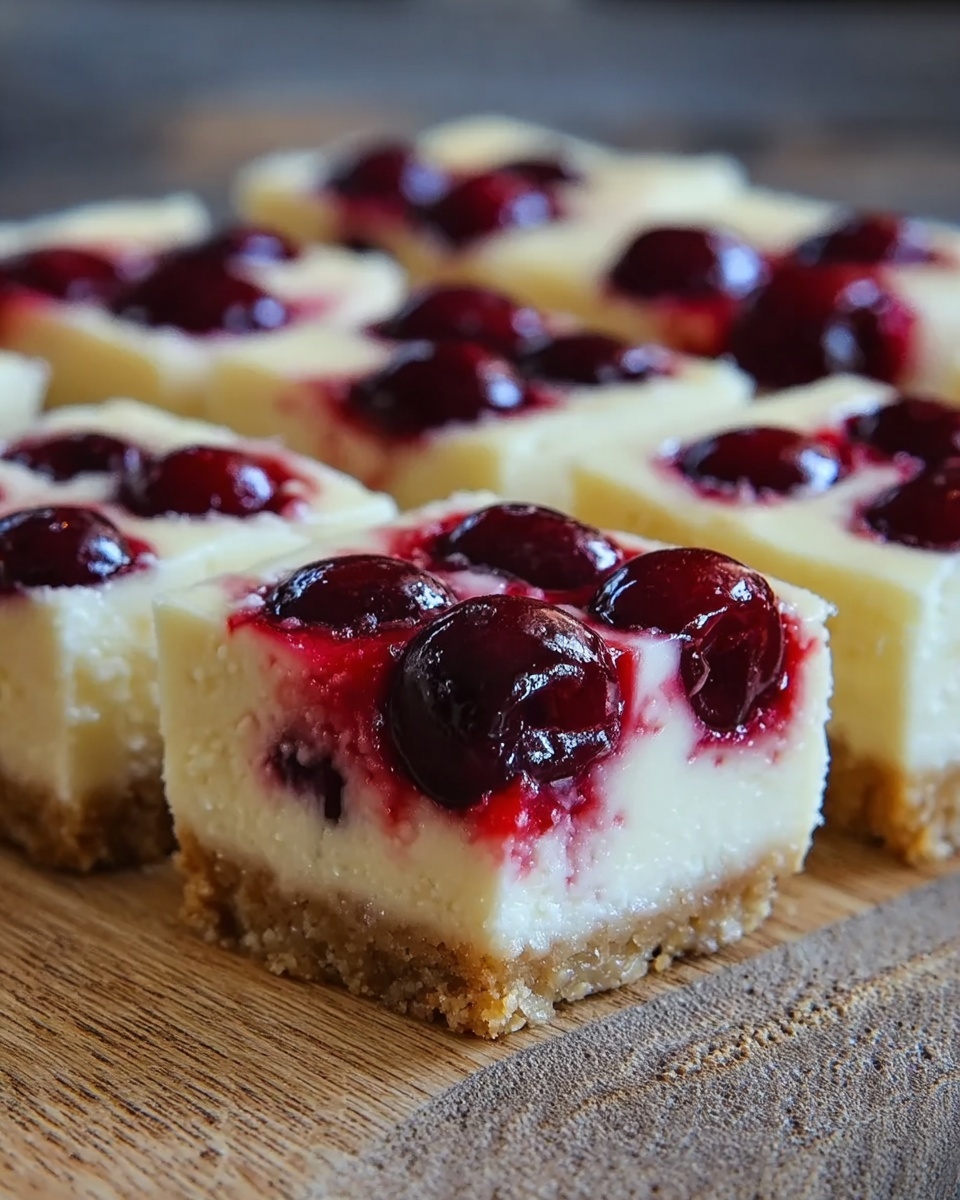
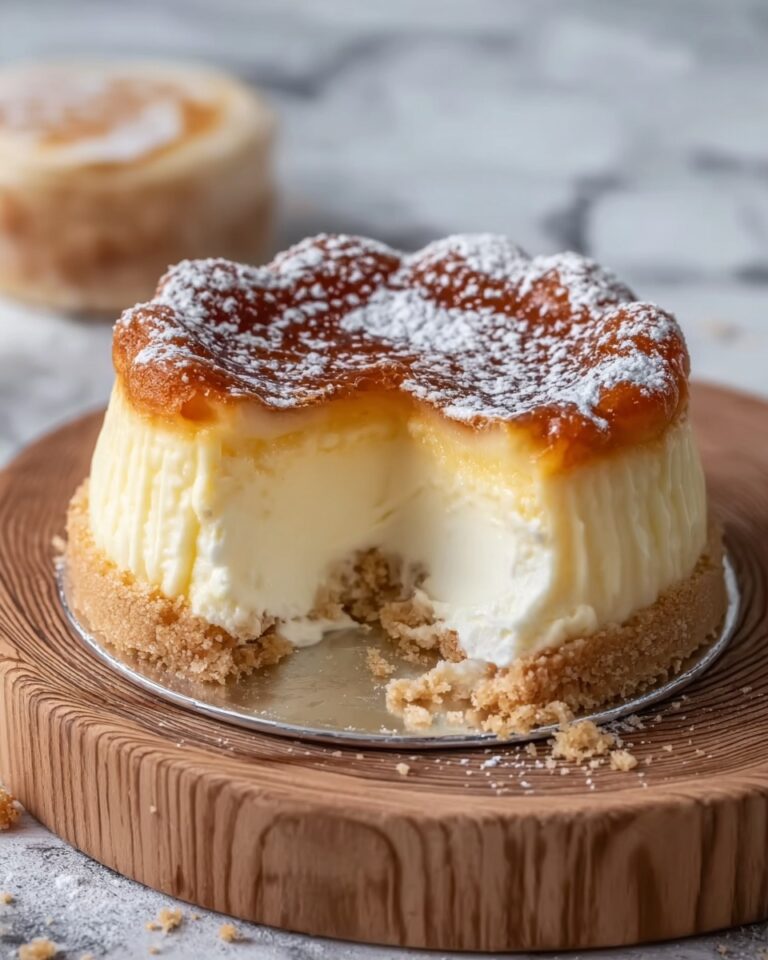
If you’re craving a dessert that perfectly balances creamy richness with a burst of fruity sweetness, you have to try this Cherry Cheesecake Bars Recipe. These bars are a delightful twist on the classic cheesecake, featuring a buttery graham cracker crust, a smooth and luscious cream cheese filling, and a vibrant cherry topping that adds both color and flavor. Whether you’re making them for a family gathering, holiday celebration, or just a weekend treat, these cherry cheesecake bars will quickly become one of your go-to favorites.

Ingredients You’ll Need
This recipe calls for simple, pantry-friendly ingredients that each play a crucial role in creating the perfect texture and flavor. From the crunchy crust to the creamy filling and the sweet cherry topping, every element works together beautifully to create a dessert you’ll want to make again and again.
- Graham cracker crumbs: About 2 cups, these form the crunchy and flavorful base that holds the bars together.
- Granulated sugar: Used twice—once for the crust and once for sweetness in the filling.
- Unsalted butter: 1/2 cup melted to bind the crust and provide richness without overpowering other flavors.
- Cream cheese: Two 8-ounce blocks softened to room temperature to ensure a creamy, smooth filling.
- Eggs: Two large eggs help the filling set while keeping it light and tender.
- Vanilla extract: Adds a lovely warm depth to the cheesecake flavor.
- Salt: Just a pinch to balance the sweetness and enhance overall taste.
- Cherry pie filling: One can, generously topped to give the bars their signature fruity finish.
How to Make Cherry Cheesecake Bars Recipe
Step 1: Prepare the baking pan and crust
Start by preheating your oven to 325°F (165°C) and lining a 9×13-inch pan with parchment paper. This not only prevents sticking but makes it easier to lift the bars out later. Next, mix the graham cracker crumbs, sugar, and melted butter until they’re evenly combined. Press this crumb mixture firmly into the bottom of your pan to form a sturdy, delicious base, then bake it for 10 minutes. This step sets the foundation for your cheesecake bars and ensures a perfectly crisp crust.
Step 2: Create the creamy cheesecake filling
Once your crust is cooling, turn your attention to the filling. Beat the softened cream cheese and sugar together with an electric mixer until smooth and creamy—this is where the magic happens to achieve that classic velvety texture. Beat in the eggs one at a time to keep everything well incorporated without overworking the mixture. Stir in vanilla extract and a pinch of salt for balance. Keep the mixing gentle after adding the eggs to avoid air bubbles, which can cause cracks during baking.
Step 3: Assemble and bake
Pour your luscious cheesecake filling evenly over the cooled crust, spreading it with a spatula for an even layer. Pop the pan back into the oven and bake for 35 to 40 minutes. You want the edges to be set but the center to still jiggle slightly—that’s your sign the cheesecake won’t be dry and will be perfectly creamy once chilled. After baking, let the bars cool completely at room temperature to avoid condensation when refrigerated.
Step 4: Chill and add cherry topping
Once your cheesecake bars have cooled, refrigerate them for at least 4 hours or overnight. This chilling process is crucial—it allows the bars to set firmly, making them easier to slice and enhancing their creamy texture. Finally, spread the cherry pie filling evenly over the chilled cheesecake layer, giving you that luscious fruity finish that makes this Cherry Cheesecake Bars Recipe so irresistible.
Step 5: Cut and serve
Lift the cheesecake bars out of the pan using the parchment paper overhang for a clean release. Slice into squares and serve chilled for the best taste and texture. These bars store beautifully, so you can enjoy a sweet treat anytime.
How to Serve Cherry Cheesecake Bars Recipe
Garnishes
While the cherry topping is already a fantastic feature, consider adding a dollop of freshly whipped cream or a sprinkle of toasted almond slices for extra texture and elegance. A few fresh cherries or a dusting of powdered sugar can also elevate the presentation, making the dessert feel special for guests or celebrations.
Side Dishes
Cherry cheesecake bars pair wonderfully with light, complementary sides like fresh fruit salads or a scoop of vanilla ice cream. Their richness contrasts nicely with tangy or refreshing sides such as citrus-infused berries or a simple green salad with a light vinaigrette if you’re serving them as part of a larger meal.
Creative Ways to Present
If you’re bringing these bars to a party, try cutting them into mini squares or even heart shapes for a festive touch. You can also serve individual bars in small dessert cups, layering extra cherry topping and whipped cream for an elegant parfait-style presentation that guests will love.
Make Ahead and Storage
Storing Leftovers
After enjoying your fresh cherry cheesecake bars, store any leftovers in an airtight container in the refrigerator. They will stay delicious and creamy for up to four days, making it easy to snack on this dessert throughout the week without any loss in quality.
Freezing
These bars freeze exceptionally well. Wrap them tightly in plastic wrap and then foil to prevent freezer burn. When stored properly, they can last up to two months in the freezer. Thaw in the refrigerator overnight before serving for the best texture and flavor.
Reheating
Since this is a chilled dessert, reheating isn’t necessary or recommended. Instead, simply remove the bars from the fridge about 15 minutes before serving to soften slightly, which brings out their creamy texture and full flavors.
FAQs
Can I use fresh cherries instead of cherry pie filling?
Absolutely! Fresh cherries can add a wonderful natural flavor and texture. You’ll want to cook them down with a bit of sugar and cornstarch to create a thick topping similar to pie filling. This homemade version can be tailored to your taste and adds a refreshing fruitiness to the bars.
How do I prevent cracks in the cheesecake filling?
To keep your filling smooth and crack-free, avoid overmixing after adding the eggs and bake at a moderate temperature. Also, letting the bars cool gradually and not rushing to chill them helps minimize cracking. Baking until the center slightly jiggles is a key tip for moist and crack-free cheesecake.
Can I make this recipe gluten-free?
Yes! Simply substitute the graham cracker crumbs with a gluten-free alternative, like gluten-free graham or digestive biscuit crumbs. Be sure the cherry pie filling you choose is also gluten-free to keep the entire dessert safe for those with gluten sensitivities.
What can I do if I don’t have an electric mixer?
You can still make these bars by whisking the cream cheese and sugar vigorously by hand until smooth. It might take a bit longer, but patience will pay off. When adding eggs, mix gently with a spatula to keep the filling light and creamy.
How do I know when the bars are baked perfectly?
Look for set edges and a center that jiggles slightly when you gently shake the pan. Overbaking will dry out the cheesecake, so it’s better to err on the side of slightly underbaked since chilling will firm them up nicely.
Final Thoughts
There’s something so comforting and joyful about homemade Cherry Cheesecake Bars Recipe. From their buttery crust to the creamy filling and the lively cherry topping, these bars bring together everything you want in a dessert—in one easy-to-make treat. I hope you’ll give this recipe a try and find yourself reaching for these bars time and time again, sharing them with friends, family, or indulging in a well-deserved sweet moment all by yourself.
Print
Cherry Cheesecake Bars Recipe
- Prep Time: 10 minutes
- Cook Time: 50 minutes
- Total Time: 5 hours (including chilling time)
- Yield: 24 servings
- Category: Dessert
- Method: Baking
- Cuisine: American
Description
These Cherry Cheesecake Bars combine a buttery graham cracker crust with a rich, creamy cheesecake layer topped with a luscious cherry pie filling. Perfectly sweet and tart, this easy-to-make dessert is ideal for gatherings or a delightful treat anytime.
Ingredients
Crust
- 2 cups graham cracker crumbs (about 16 full sheets)
- 1/4 cup granulated sugar
- 1/2 cup (1 stick) unsalted butter, melted
Cheesecake Filling
- 16 oz (2 blocks) cream cheese, softened to room temperature
- 2/3 cup granulated sugar
- 2 large eggs
- 2 teaspoons vanilla extract
- 1/4 teaspoon salt
Topping
- 1 can (21 oz) cherry pie filling
Instructions
- Prepare Oven and Pan: Preheat the oven to 325°F (165°C). Line a 9×13-inch baking pan with parchment paper, leaving an overhang on the sides for easy removal of the bars later.
- Make and Bake Crust: In a medium bowl, mix together the graham cracker crumbs, granulated sugar, and melted butter until the crumbs are fully moistened. Press this mixture firmly and evenly into the bottom of the prepared pan. Bake the crust for 10 minutes, then remove and set aside to cool.
- Mix Cheesecake Filling: In a large bowl, use an electric mixer to beat the softened cream cheese and granulated sugar until smooth and creamy, about 2 minutes. Add the eggs one at a time, mixing on low speed after each addition to avoid overmixing. Stir in the vanilla extract and salt until just combined.
- Assemble Cheesecake Layer: Pour the cheesecake filling evenly over the cooled crust in the pan, spreading it out to cover the surface.
- Bake the Cheesecake: Place the pan in the preheated oven and bake for 35-40 minutes. The edges should be set while the center remains slightly jiggly. Remove from oven and allow to cool completely at room temperature.
- Chill the Cheesecake: Once cooled, refrigerate the cheesecake for at least 4 hours or preferably overnight to fully set and firm up.
- Add Cherry Topping: Before serving, evenly spread the cherry pie filling over the chilled cheesecake layer to create a beautiful and flavorful topping.
- Serve: Lift the cheesecake bars out of the pan using the parchment paper overhang, slice into 24 squares, and enjoy chilled.
Notes
- Make sure the cream cheese is softened to room temperature to avoid lumps in the cheesecake filling.
- Do not overmix the batter when adding eggs to prevent cracks during baking.
- Use parchment paper with an overhang for easy removal of the bars without breaking.
- Refrigeration is essential to help the cheesecake set properly before adding the cherry topping.
- These bars can be stored covered in the refrigerator for up to 4 days.


