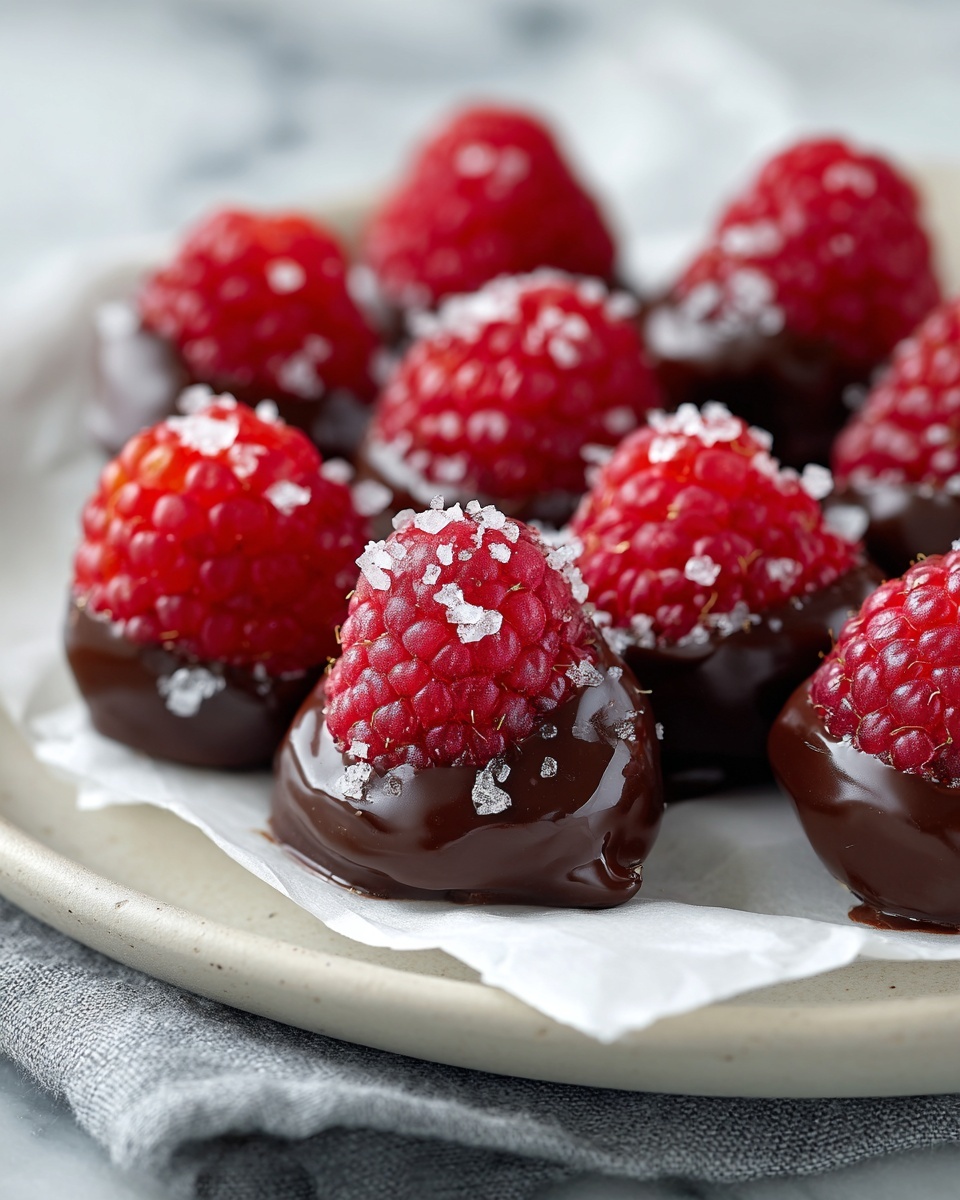
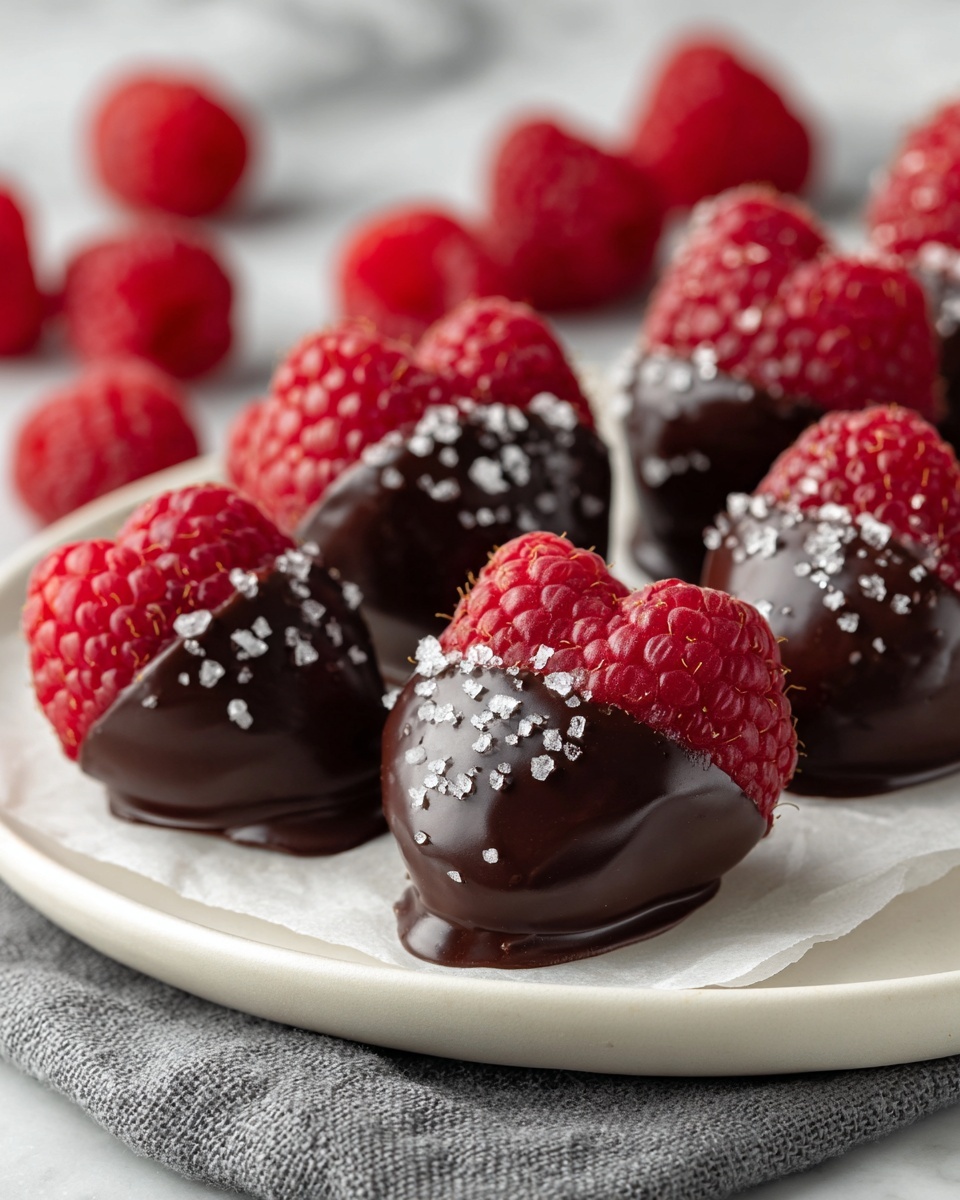
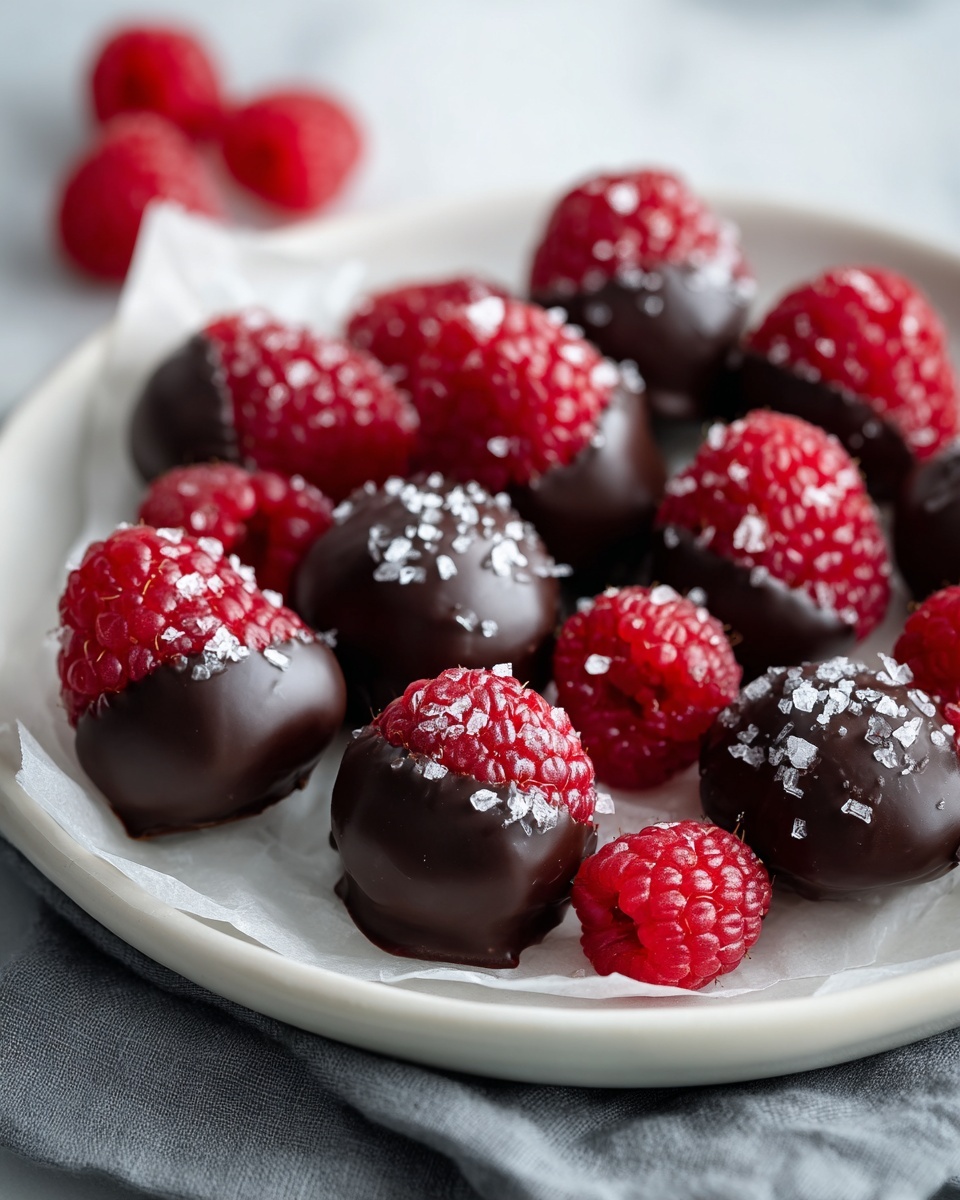
If you are looking for a delightful treat that feels both indulgent and fresh, this Chocolate Covered Raspberries Recipe will quickly become one of your favorites. Juicy raspberries coated in rich, velvety dark chocolate bring together a harmony of tartness and sweetness that dances on your taste buds. Perfect for any occasion, this simple yet elegant dessert combines minimal ingredients with maximum flavor, offering a fresh take on a classic delight that’s easy to prepare and impossible to resist.
Ingredients You’ll Need
Getting these ingredients together is quick and straightforward, but each one plays a crucial role in making this recipe shine. The tart freshness of raspberries balances the luxurious dark chocolate, while optional additions like coconut oil and vanilla add depth and gloss to the final creation.
- 12 oz fresh raspberries: Choose firm, ripe berries that are free of blemishes for the best texture and flavor.
- 8 oz dark chocolate (70% cocoa or preferred variety): Select a good-quality chocolate to ensure a smooth, rich coating.
- 2 teaspoons coconut oil (optional): Helps give the chocolate a beautiful shine and a silky texture.
- 1/2 teaspoon sea salt (optional): Adds a perfect salty contrast that brings out the chocolate’s complexity.
- 1 teaspoon vanilla extract (optional): Enhances the chocolate flavor with a warm, aromatic touch.
How to Make Chocolate Covered Raspberries Recipe
Step 1: Prep Your Raspberries
Start by gently rinsing your fresh raspberries under cool water, then carefully pat them dry using paper towels. Ensuring they are thoroughly dry is key because any moisture can prevent the chocolate from adhering properly, and you want that crisp, even coating.
Step 2: Prepare Your Workspace
Line a baking sheet with parchment paper or a silicone mat. This makes removing the dipped raspberries later a cinch and prevents them from sticking to the surface while the chocolate sets.
Step 3: Melt the Chocolate
Using a heatproof bowl set over a simmering pot of water, slowly melt the dark chocolate along with coconut oil if you like. If you prefer microwave melting, heat in 20-second bursts, stirring between each until the chocolate is smooth and glossy. This gentle method ensures your chocolate doesn’t scorch or seize up.
Step 4: Flavor the Chocolate
Once your chocolate has melted, stir in the vanilla extract if you’re using it. This small addition will elevate the flavor profile with a subtle, fragrant warmth that pairs beautifully with both chocolate and raspberries.
Step 5: Dip the Raspberries
Carefully hold each raspberry by its stem and dip it into the melted chocolate, turning to coat evenly. Give it a gentle shake to let excess chocolate drip off to avoid clumps and to keep that delicate berry texture intact.
Step 6: Arrange and Finish
Place your dipped raspberries on the lined baking sheet with enough space so they don’t touch. If you’re feeling adventurous, sprinkle a pinch of sea salt on top while the chocolate is still wet to add an irresistible salty note that makes the flavors pop.
Step 7: Chill and Set
Pop your tray into the refrigerator for about 30 minutes. This chilling step firms up the chocolate, ensuring a satisfying snap with each bite and preserving the freshness of the raspberries inside.
Step 8: Enjoy or Store
Serve your beautiful Chocolate Covered Raspberries Recipe right away or keep them fresh in an airtight container in the fridge for up to three days—perfect for sharing or savoring over time.
How to Serve Chocolate Covered Raspberries Recipe
Garnishes
To make your presentation shine, consider topping your chocolate covered raspberries with crushed pistachios, edible gold leaf, or even a light dusting of powdered sugar. These touches add a bit of sophistication and visual appeal that turn a simple treat into a dessert masterpiece.
Side Dishes
This luscious treat pairs beautifully with light, complementary sides such as vanilla bean ice cream, a dollop of whipped cream, or even alongside a selection of fine cheeses and nuts for a dessert board. The tangy raspberries and bittersweet chocolate balance richer, creamy textures perfectly.
Creative Ways to Present
Instead of arranging them on a flat tray, try skewering your chocolate covered raspberries on small wooden picks or cocktail sticks for a fun party platter or edible bouquet. You can also serve them in elegant glass cups layered with mousse or panna cotta for an impressive layered dessert that wows your guests.
Make Ahead and Storage
Storing Leftovers
If you have any of this irresistible Chocolate Covered Raspberries Recipe left over, store them in an airtight container in the refrigerator. Proper storage will keep the chocolate crisp and the raspberries fresh for up to three days—perfect if you want to prepare ahead for a special occasion.
Freezing
If you prefer to keep these treats longer, they freeze well. Arrange the dipped raspberries in a single layer on a baking sheet and freeze until solid, then transfer them to a sealed freezer bag or container. When you’re ready to enjoy, thaw them gently in the refrigerator to maintain their texture and flavor.
Reheating
Chocolate covered raspberries are best enjoyed cold or at room temperature, so reheating isn’t recommended as it can cause the chocolate to melt and lose its lovely snap. Instead, allow frozen treats to thaw naturally for a fresh experience each time.
FAQs
Can I use white or milk chocolate instead of dark chocolate?
Absolutely! While dark chocolate provides a rich contrast to the tart raspberries, white or milk chocolate can be used depending on your preference. Just be sure to choose good-quality chocolate for the best taste and texture.
How do I prevent the chocolate from seizing when melting?
Melting chocolate gently over low heat or in short microwave bursts and stirring frequently helps prevent it from overheating or coming into contact with water, which causes seizing. Adding a little coconut oil can also improve smoothness.
Can I use frozen raspberries?
Fresh raspberries work best because frozen ones release moisture as they thaw, making it difficult for the chocolate to stick properly. If you only have frozen berries, make sure to fully dry them after thawing before dipping.
What if I don’t have coconut oil?
Coconut oil is optional and only adds extra shine and a silky texture. If you don’t have it, simply melt the chocolate on its own—it will still taste delicious, though slightly less glossy.
Can I skip the sea salt?
You can definitely skip the sea salt if you prefer a purely sweet experience. However, the slight saltiness really uplifts the chocolate’s flavor, so it’s worth trying if you enjoy a balance of sweet and savory notes.
Final Thoughts
This Chocolate Covered Raspberries Recipe is one of those little pleasures that feels both elegant and effortless. Whether you’re preparing for a special dinner, a casual snack, or a thoughtful gift, this recipe will bring joy with every bite. Don’t hesitate to give it a try—you’ll find it’s as rewarding to make as it is delicious to eat.
Print
Chocolate Covered Raspberries Recipe
- Prep Time: 10 minutes
- Cook Time: 0 minutes
- Total Time: 40 minutes
- Yield: 12 servings
- Category: Dessert
- Method: No-Cook
- Cuisine: American
- Diet: Vegetarian
Description
Delight in these elegant Chocolate Covered Raspberries, a simple yet sophisticated treat combining fresh, juicy raspberries with rich dark chocolate. Perfect for an indulgent snack or a beautiful dessert, this recipe uses minimal ingredients and requires no cooking, making it quick and easy to prepare.
Ingredients
Main Ingredients
- 12 oz fresh raspberries
- 8 oz dark chocolate (70% cocoa or your preferred variety)
Optional Ingredients
- 2 teaspoons coconut oil (for extra shine)
- 1/2 teaspoon sea salt (for sprinkling)
- 1 teaspoon vanilla extract (for added flavor)
Instructions
- Prepare the raspberries: Gently rinse the raspberries under cool water and carefully pat them dry with paper towels. Make sure they are completely dry before dipping to ensure the chocolate adheres properly.
- Prepare your workspace: Line a baking sheet with parchment paper or a silicone mat. This will make it easy to remove the raspberries once the chocolate sets.
- Melt the chocolate: Place the dark chocolate and coconut oil (if using) in a heatproof bowl over a double boiler. Stir occasionally until smooth and fully melted. Alternatively, microwave in 20-second bursts, stirring well between each interval to avoid burning.
- Add vanilla extract: Stir in the vanilla extract to enhance the chocolate’s flavor, if you choose to use it.
- Dip the raspberries: Hold each raspberry gently by the stem and dip it into the melted chocolate. Tap or shake lightly to remove any excess chocolate, ensuring a smooth coating.
- Arrange on the baking sheet: Place the dipped raspberries on the prepared baking sheet. If desired, sprinkle a pinch of sea salt on top to add a hint of contrasting flavor.
- Set the chocolate: Place the baking sheet in the refrigerator and chill for about 30 minutes, or until the chocolate hardens completely.
- Serve and store: Enjoy immediately or transfer the chocolate covered raspberries to an airtight container and store in the refrigerator for up to 3 days to maintain freshness.
Notes
- Ensure raspberries are completely dry to prevent the chocolate from seizing.
- Use high-quality chocolate for best flavor and texture.
- The coconut oil is optional but adds a glossy finish to the chocolate coating.
- Sprinkling sea salt adds a lovely contrast to the sweetness.
- Store leftovers refrigerated and consume within 3 days for optimal freshness.
