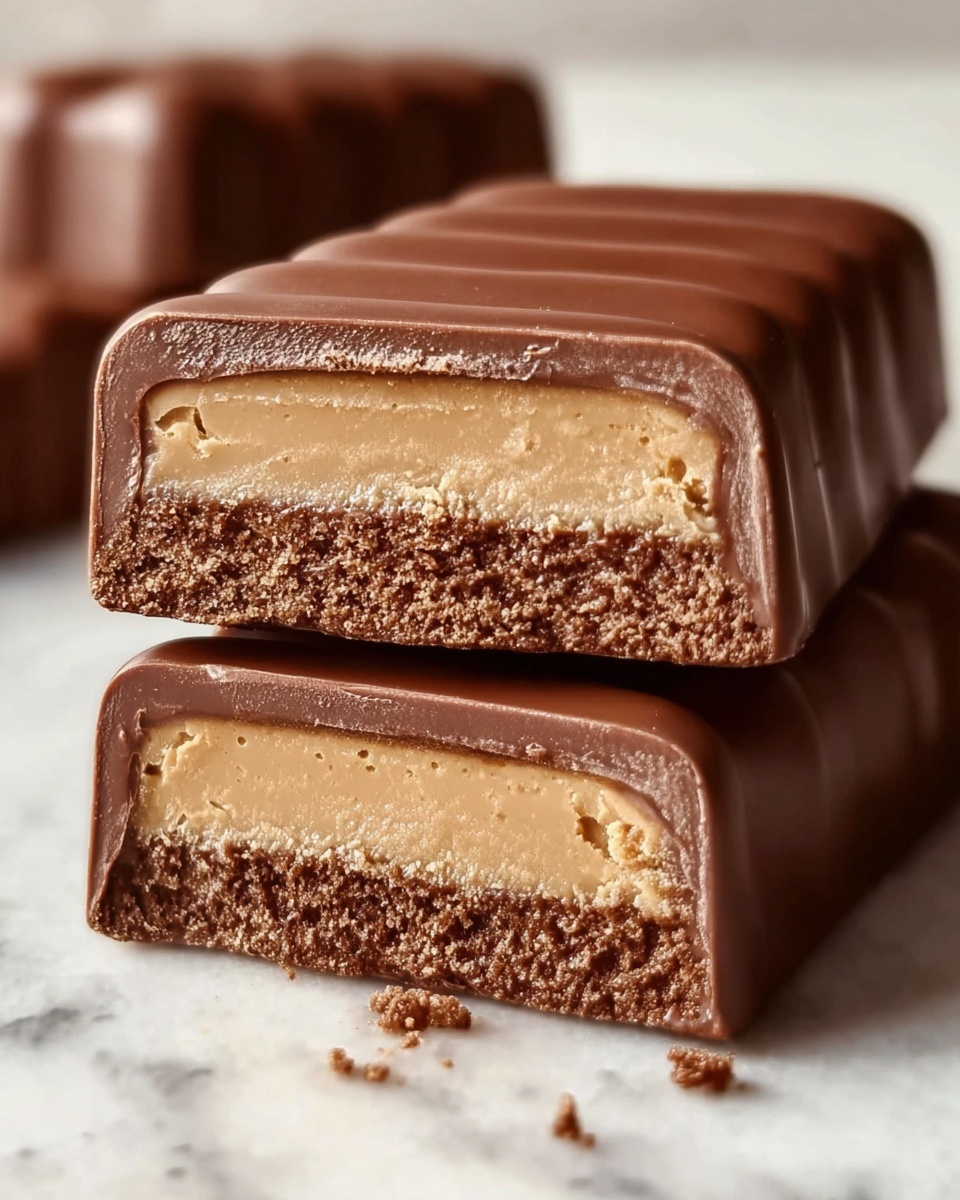
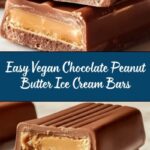
If you have a soft spot for creamy, dreamy desserts that pack a punch of rich flavor without any dairy, you are going to fall head over heels for this Chocolate Peanut Butter Ice Cream Bars (Vegan) Recipe. It’s the perfect marriage of luscious coconut milk and smooth peanut butter, cloaked in decadent dark chocolate, making every bite an irresistible frozen treat. Whether you’re vegan, gluten-free, or just craving something truly indulgent and refreshing, these bars are bound to become your new go-to dessert on hot days or whenever a sweet escape is needed.
Ingredients You’ll Need
The magic of this Chocolate Peanut Butter Ice Cream Bars (Vegan) Recipe lies in its simplicity and the quality of a few carefully selected ingredients. Each one plays a starring role in delivering that perfect balance of creaminess, sweetness, and rich chocolate flavor you’ll adore.
- 2 cups canned full-fat coconut milk (chilled): This provides the silky, creamy base that makes the ice cream bars so luscious without any dairy.
- 1/2 cup natural peanut butter (smooth and unsweetened): Adds a rich, nutty flavor and creamy texture that pairs beautifully with the chocolate.
- 1/3 cup maple syrup or agave nectar: A natural sweetener that lends just the right amount of sweetness without overpowering the other flavors.
- 1 teaspoon vanilla extract: Enhances the overall flavor profile with a warm, fragrant note that ties everything together.
- 1/4 teaspoon salt: A pinch that helps balance the sweetness and intensifies the peanut butter and chocolate taste.
- 1 1/4 cups vegan dark chocolate chips: For that indulgent coating that adds crunch and deep cocoa richness to every bite.
- 2 tablespoons coconut oil: Helps melt the chocolate smoothly and creates a glossy, firm coating once chilled.
- 1/4 cup chopped peanuts (optional, for topping): Adds a delightful crunch and extra peanut flavor if you want to take things up a notch.
How to Make Chocolate Peanut Butter Ice Cream Bars (Vegan) Recipe
Step 1: Blend the Base
Start by combining the chilled coconut milk, peanut butter, maple syrup, vanilla extract, and salt in a blender. Blend everything until it’s irresistibly smooth and creamy. This step is crucial—it ensures that your bars will have that perfect velvety texture that feels like a dream with each bite.
Step 2: Freeze the Mixture
Pour the luscious mixture into a silicone ice cream bar mold or a parchment-lined loaf pan. Pop it into the freezer and let it chill for at least 4 to 6 hours. This waiting period helps the mixture firm up beautifully so the bars hold their shape and deliver that satisfying ice cream bar experience.
Step 3: Prepare the Chocolate Coating
Once the bars are frozen solid, it’s time to make the magic happen with the chocolate coating. Melt your vegan dark chocolate chips together with the coconut oil in a microwave or over a double boiler until smooth and glossy. Allow the chocolate to cool slightly so it’s warm but not hot—this will keep your bars from melting when you dip them.
Step 4: Dip and Decorate
Carefully dip each frozen bar into the melted chocolate, making sure it’s fully coated in that rich, dark goodness. Place the chocolate-covered bars on a parchment-lined tray and sprinkle chopped peanuts on top if you like a little extra crunch and nuttiness. Pop the tray back into the freezer for 10 to 15 minutes to let the chocolate harden perfectly.
How to Serve Chocolate Peanut Butter Ice Cream Bars (Vegan) Recipe
Garnishes
Even though these bars shine on their own, adding a few thoughtful garnishes can elevate the presentation and taste. Try sprinkling a touch of flaky sea salt for contrast, or dusting with cocoa powder or crushed freeze-dried raspberries for a pop of color and flavor complexity.
Side Dishes
Pair these bars with fresh berries or a small bowl of sliced bananas for a fruity companion that complements the rich chocolate peanut butter flavor perfectly. A drizzle of extra maple syrup or a dollop of coconut whipped cream makes for a treat-worthy pairing as well.
Creative Ways to Present
For a fun twist, serve the bars on popsicle sticks for easy handheld enjoyment. You can also sandwich two bars together with a layer of vegan chocolate ganache or peanut butter for a double-decker delight. These bars also work beautifully chopped and folded into a vegan chocolate brownie sundae for a playful and delicious dessert platter.
Make Ahead and Storage
Storing Leftovers
These bars are best kept in an airtight container in the freezer to maintain freshness and avoid any freezer odors. Stored properly, they stay delicious for up to 2 weeks, making them an ideal make-ahead dessert when a sweet craving strikes suddenly.
Freezing
Since they are a frozen treat, the bars need ample time in the freezer to set firmly. If you plan on making a batch ahead, double freeze them after dipping in chocolate to ensure the coating stays crisp and the inside remains creamy, not icy.
Reheating
While these bars are enjoyed frozen, if you happen to leave one out for a few minutes and it softens too much, just pop them back in the freezer to firm up again. Avoid microwaving or thawing them at room temperature for long periods as that will change the texture drastically.
FAQs
Can I use other nut butters instead of peanut butter?
Absolutely! Almond or cashew butter are great alternatives that offer slightly different flavors but still maintain the creamy texture and richness this recipe needs.
Is full-fat coconut milk necessary for this recipe?
Yes, using full-fat coconut milk is key because it provides the creamy, rich base needed for a smooth ice cream texture without any dairy.
Can I sweeten these bars with something else besides maple syrup?
You can swap maple syrup with agave nectar or even a liquid sweetener like brown rice syrup if you prefer, but maple syrup adds a lovely depth of flavor that complements the peanut butter and chocolate beautifully.
What if I don’t have an ice cream bar mold?
No worries! Pour the mixture into a parchment-lined loaf pan and freeze. Once firm, slice into bars. This method works just as well and is perfect if you don’t have molds on hand.
How do I keep the chocolate coating from cracking when I bite into the bars?
Make sure to melt the chocolate with a bit of coconut oil for smoothness, and let it set firmly in the freezer. Also, enjoy the bars straight from the freezer for that perfect crisp shell with a creamy bite.
Final Thoughts
I truly hope you give this Chocolate Peanut Butter Ice Cream Bars (Vegan) Recipe a try because it delivers such an amazing combination of flavors and textures with ease and wholesome ingredients. It’s a fantastic way to treat yourself and your loved ones to something deliciously indulgent and cruelty-free. Once you taste how creamy and rich these bars are, they’ll be a staple in your dessert rotation all year round!
Print
Chocolate Peanut Butter Ice Cream Bars (Vegan) Recipe
- Prep Time: 10 minutes
- Cook Time: 0 minutes
- Total Time: 10 minutes plus 4–6 hours freezing
- Yield: 6 bars
- Category: Dessert
- Method: Freezing
- Cuisine: American
- Diet: Vegan
Description
Deliciously creamy and rich Chocolate Peanut Butter Ice Cream Bars that are completely vegan and gluten-free. Made with full-fat coconut milk and natural peanut butter, these no-bake frozen treats combine smooth peanut butter ice cream with a decadent chocolate coating for a perfect guilt-free dessert.
Ingredients
Ice Cream Base
- 2 cups canned full-fat coconut milk (chilled)
- 1/2 cup natural peanut butter (smooth and unsweetened)
- 1/3 cup maple syrup or agave nectar
- 1 teaspoon vanilla extract
- 1/4 teaspoon salt
Chocolate Coating
- 1 1/4 cups vegan dark chocolate chips
- 2 tablespoons coconut oil
- 1/4 cup chopped peanuts (optional, for topping)
Instructions
- Prepare the Ice Cream Mixture: In a blender, combine the chilled coconut milk, natural peanut butter, maple syrup (or agave nectar), vanilla extract, and salt. Blend until the mixture is completely smooth and creamy, ensuring all ingredients are well incorporated.
- Freeze the Mixture: Pour the blended mixture into a silicone ice cream bar mold or into a parchment-lined loaf pan. Place it in the freezer and allow it to freeze for at least 4 to 6 hours, or until it is completely solid.
- Remove and Prepare for Chocolate Coating: Once the ice cream mixture is fully frozen, remove the bars from the mold. If using a loaf pan, slice the frozen mixture into bars. Return the bars to the freezer to keep them solid while you prepare the chocolate coating.
- Melt the Chocolate: Melt the vegan dark chocolate chips together with the coconut oil using a microwave in short intervals, stirring frequently, or by using a double boiler until the mixture is smooth and glossy. Allow the melted chocolate to cool slightly but remain liquid.
- Coat the Bars: Dip each frozen ice cream bar into the melted chocolate, ensuring it is fully coated. Place the coated bars on a parchment-lined tray, then sprinkle the tops with chopped peanuts if using.
- Set the Chocolate Coating: Return the coated bars to the freezer for 10 to 15 minutes to allow the chocolate to harden and set completely. Once set, serve the bars frozen for the best texture and taste.
Notes
- Use natural peanut butter without added sugar or oils for the best texture and flavor.
- Almond or cashew butter can be substituted for peanut butter if preferred.
- Store the bars in an airtight container in the freezer for up to two weeks to maintain freshness.
- Ensure coconut milk is well chilled before blending to achieve optimal creaminess.
