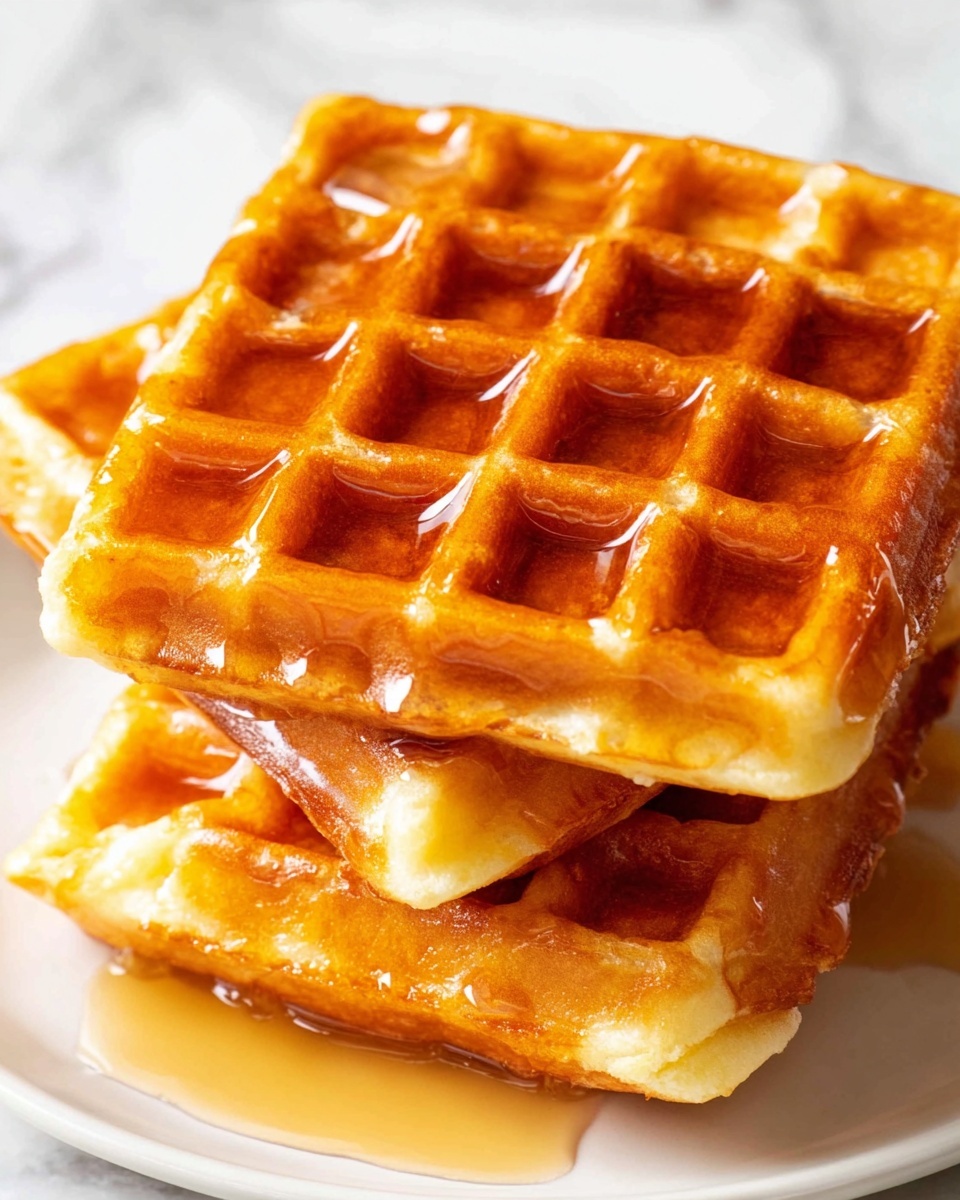
If you have been on the lookout for a delightful breakfast treat that doesn’t compromise on flavor or dietary needs, this Easy Gluten-Free Oat Waffles Recipe is just what your mornings have been missing. These waffles manage to be crispy on the outside yet tender and fluffy inside, all while using wholesome oat flour that’s naturally gluten-free. Whether you’re gluten-sensitive, looking to cut down on processed grains, or simply craving a wholesome twist on a classic brunch favorite, these waffles deliver comfort and satisfaction in every bite. Plus, they come together faster than you might expect, making them a perfect weekend indulgence or a nourishing weekday pick-me-up.
Ingredients You’ll Need
Making these waffles requires a handful of simple, thoughtfully chosen ingredients that each play a vital role in creating the perfect texture, flavor, and aroma. Every item here is essential, whether for structure, moisture, or that subtle touch of sweetness.
- 1 ½ cups (128 grams) oat flour: Provides a hearty, naturally gluten-free base packed with fiber and a gentle, nutty flavor.
- 2 teaspoons baking powder: The leavening agent that lifts your waffles to light, fluffy perfection.
- ½ teaspoon salt: Balances flavors and enhances the sweetness naturally present.
- Pinch of cinnamon (optional): Adds warm, aromatic depth without overpowering the batter.
- ¾ cup room temperature milk of choice: You can use light coconut milk, nut milk, or cow’s milk for creaminess and moisture.
- ¼ cup + 1 tablespoon melted coconut oil or 5 tablespoons unsalted butter, melted: This fat ensures golden crispness and a rich mouthfeel.
- 2 large eggs: Bind the ingredients together and add structure to the waffles.
- 2 tablespoons maple syrup: Natural sweetener that complements the oats and adds that subtle hint of caramel.
- 1 teaspoon vanilla extract: Rounds out the flavor profile with smooth, inviting notes.
How to Make Easy Gluten-Free Oat Waffles Recipe
Step 1: Mix the Dry Ingredients
Begin by whisking together the oat flour, baking powder, salt, and cinnamon in a large bowl. This step is crucial to evenly distribute the leavening and spices throughout the batter, ensuring each waffle cooks up with consistent flavor and rise.
Step 2: Combine the Wet Ingredients
In a separate bowl, whisk together your milk, melted coconut oil or butter, eggs, maple syrup, and vanilla extract until completely mixed. If the coconut oil starts to solidify, a quick zap in the microwave will help it melt smoothly back into the batter.
Step 3: Bring Wet and Dry Together
Pour your wet mixture into the dry ingredients and stir gently until just combined. Don’t worry about a few lumps – overmixing can make waffles tough. Let the batter rest for about 10 minutes so the oat flour fully absorbs the moisture, creating a more cohesive and tender texture.
Step 4: Preheat Your Waffle Iron
Now’s the time to fire up your waffle iron. Setting it to medium-high heat usually works well for achieving a beautifully golden crust that’s crisp without burning.
Step 5: Cook the Waffles
Give your batter a quick stir, then pour enough to cover the waffle iron’s center. Close the lid and wait patiently as the batter cooks into deep golden, crisp waffles. The smell alone will have you excited to dig in!
Step 6: Keep Warm and Serve
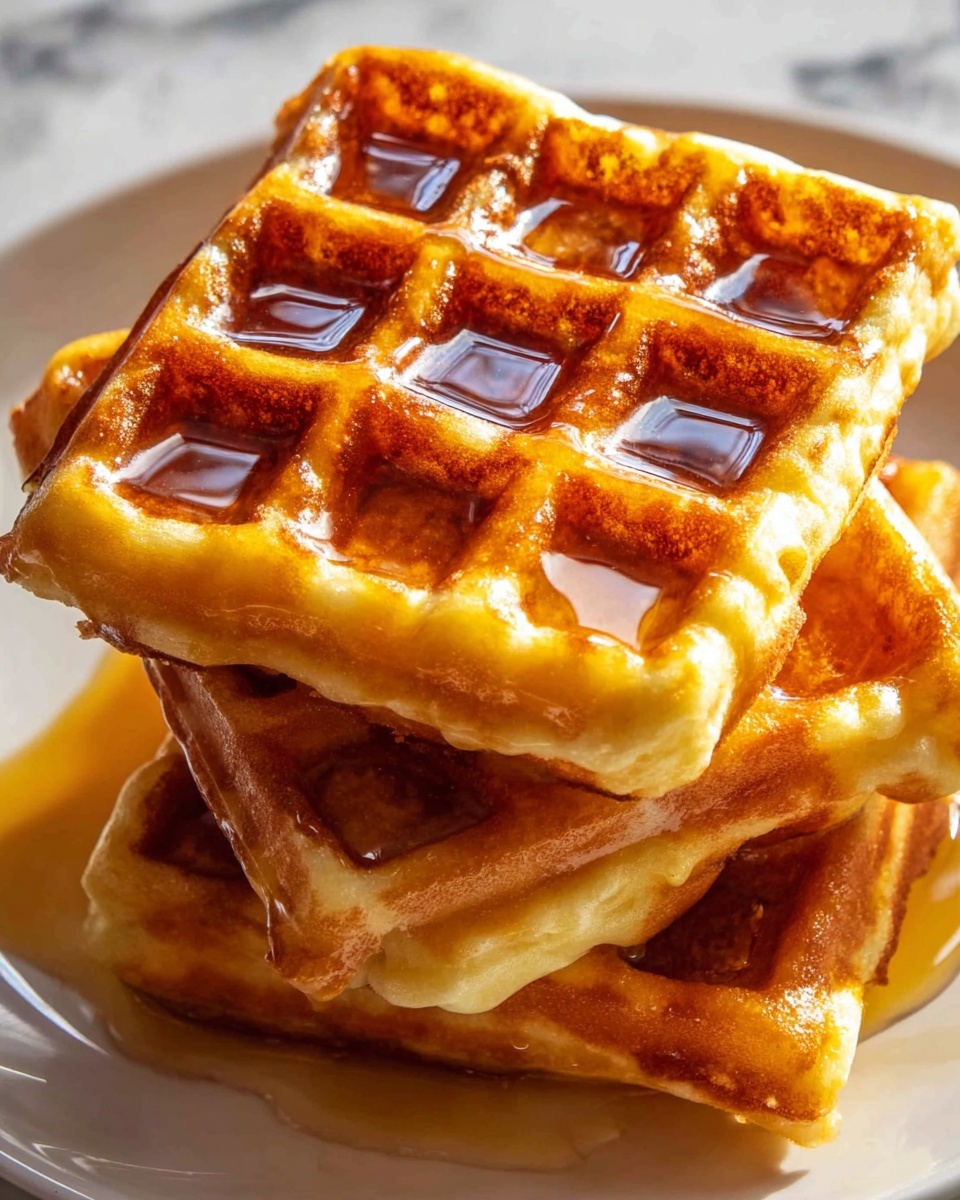
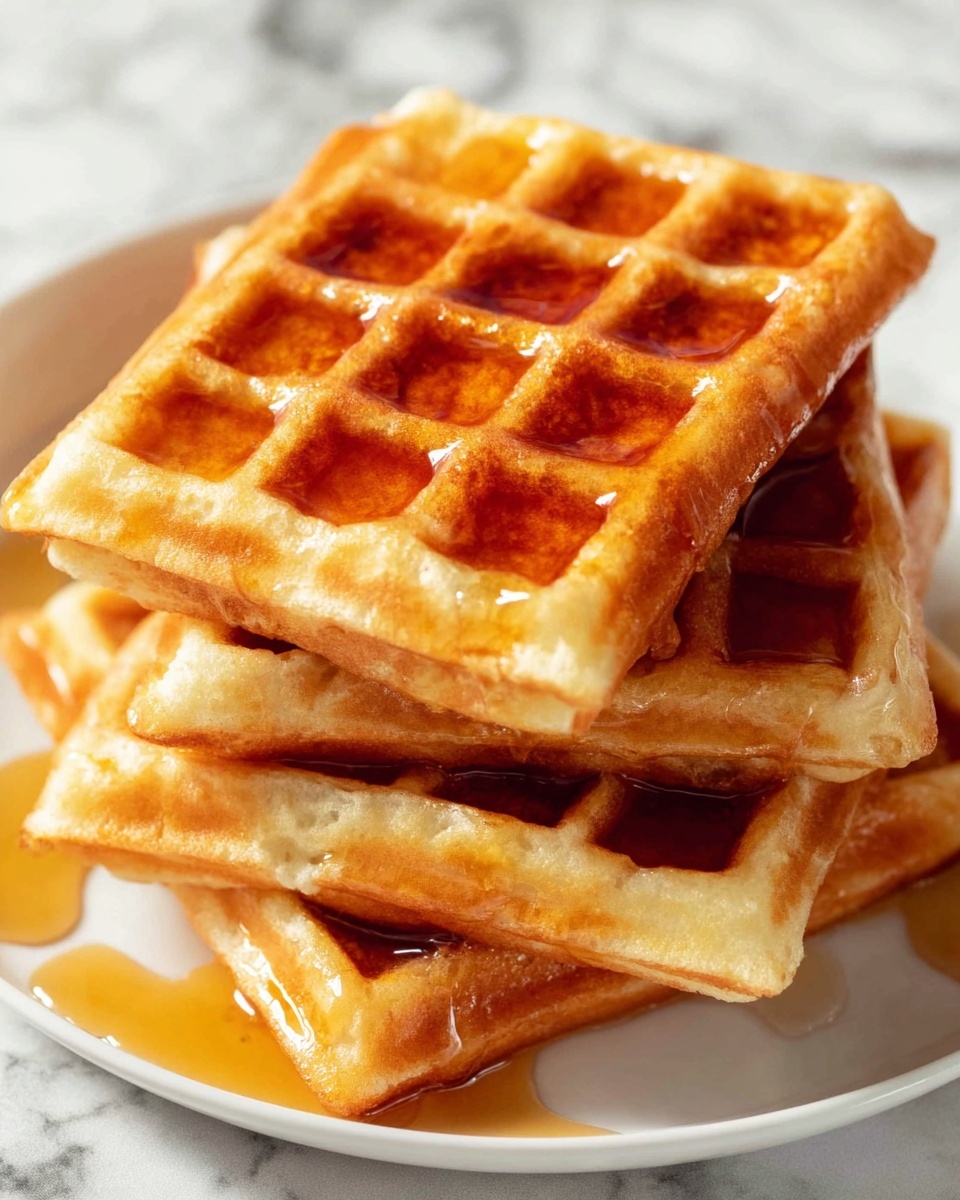
Once cooked, transfer the waffles to a wire rack or baking sheet, avoiding stacking to maintain their crunch. If you need to keep them warm while finishing the batch, place them in a 200°F oven. Serve right away topped with your favorite syrup, nut butter, or fresh fruit.
How to Serve Easy Gluten-Free Oat Waffles Recipe
Garnishes
Garnishing these waffles is the fun part because you can personalize each stack to your taste. Classic options like pure maple syrup or a pat of melting butter are never wrong, but adding fresh berries, sliced bananas, a sprinkle of chopped nuts, or even a dollop of Greek yogurt takes the experience to the next level. A dusting of powdered sugar or a drizzle of honey also adds a touch of sweetness and visual appeal.
Side Dishes
When serving these waffles, consider pairing them with sides that balance and complement. Crispy bacon or breakfast sausage offer a savory contrast, while a simple fruit salad brings freshness and lightness. For a wholesome, hearty brunch, scrambled eggs or an avocado toast alongside make a complete, crowd-pleasing meal.
Creative Ways to Present
If you want to get creative, try assembling waffle sandwiches with layers of nut butter and sliced fruit between two waffles, or use mini waffle portions as a base for elegant toppings like smoked salmon and cream cheese. Serving waffles skewered with fruit kabobs or topped with a scoop of vegan ice cream makes them just as appealing for a decadent dessert as for breakfast.
Make Ahead and Storage
Storing Leftovers
If you’ve got leftover waffles (which is rare, but lucky you), store them in an airtight container at room temperature for up to 24 hours. For longer storage, refrigeration helps keep them safe for about 2 days, although texture might soften slightly.
Freezing
These waffles freeze wonderfully! Lay them out on a baking sheet without touching and freeze until firm. Then transfer to a freezer bag or container and store for up to 2 months. Freezing locks in freshness and makes them a quick grab-and-go option any morning.
Reheating
To reclaim that fresh-from-the-iron crispness, reheat waffles in a toaster or toaster oven rather than the microwave. This prevents sogginess and revives their golden exterior perfectly. A few minutes on medium heat will do the trick!
FAQs
Can I use regular flour instead of oat flour in this Easy Gluten-Free Oat Waffles Recipe?
While regular flour will work, it changes the texture and gluten content. Oat flour gives a tender, slightly chewy bite and keeps these waffles gluten-free, so it’s best to stick with it if you need to avoid gluten.
What milk alternatives work best with this recipe?
Light coconut milk, almond milk, cashew milk, or any nut milk are excellent choices. Each adds a subtle flavor and richness. Cow’s milk also works well if you’re not avoiding dairy.
How can I make these waffles dairy-free?
Simply swap out butter for melted coconut oil and choose a plant-based milk. This keeps the waffles moist and flavorful without any dairy ingredients.
Is the batter thick or thin?
This batter tends to be slightly thicker than traditional wheat-based waffle batter because oat flour absorbs more liquid, but it should still be pourable and spread easily in your waffle iron.
Can I add mix-ins like chocolate chips or nuts?
Absolutely! Gently folding in chocolate chips, blueberries, or chopped nuts just before cooking adds delightful bursts of flavor and texture without affecting batter consistency.
Final Thoughts
There is something truly comforting and satisfying about mastering a recipe like this Easy Gluten-Free Oat Waffles Recipe that feels both nourishing and indulgent. It’s a simple way to brighten your breakfast table and accommodate special diets without sacrificing taste. So, dust off your waffle iron, give this recipe a go, and enjoy the wonderful aroma and flavors that will fill your kitchen in no time. Happy waffle making!
Print
Easy Gluten-Free Oat Waffles Recipe
- Prep Time: 15 minutes
- Cook Time: 10 minutes
- Total Time: 25 minutes
- Yield: 6 Belgian-style waffles
- Category: Breakfast
- Method: Baking
- Cuisine: American
- Diet: Gluten Free
Description
These easy gluten-free oat waffles are a wholesome and delicious breakfast option perfect for those avoiding gluten. Made with certified gluten-free oat flour and natural ingredients like coconut oil, eggs, and maple syrup, these Belgian-style waffles are crispy on the outside, tender on the inside, and ready in just 25 minutes.
Ingredients
Dry Ingredients
- 1 ½ cups (128 grams) oat flour, certified gluten-free if necessary
- 2 teaspoons baking powder
- ½ teaspoon salt
- Pinch of cinnamon (optional)
Wet Ingredients
- ¾ cup room temperature milk of choice (light coconut milk, nut milk, or cow’s milk)
- ¼ cup + 1 tablespoon melted coconut oil, or 5 tablespoons unsalted butter, melted
- 2 large eggs
- 2 tablespoons maple syrup
- 1 teaspoon vanilla extract
Instructions
- Mix Dry Ingredients: In a large mixing bowl, whisk together the oat flour, baking powder, salt, and cinnamon if using to evenly combine all dry ingredients.
- Combine Wet Ingredients: In a separate bowl, whisk together the milk, melted coconut oil or butter, eggs, maple syrup, and vanilla extract until thoroughly combined. Warm gently if coconut oil solidifies.
- Combine Wet and Dry: Pour the wet mixture into the dry ingredients and stir gently until just combined. The batter may remain slightly lumpy. Let the batter rest for 10 minutes to allow the oat flour to absorb the liquids.
- Preheat Waffle Iron: While the batter rests, plug in and preheat your waffle iron to medium-high if adjustable, ensuring it is ready to cook the waffles.
- Cook Waffles: Stir the rested batter briefly, then pour enough batter onto the hot waffle iron to cover the center and most of the surface area. Close the lid and cook until the waffles turn deeply golden and crisp.
- Keep Warm and Serve: Transfer cooked waffles to a cooling rack or baking sheet without stacking to maintain crispness. Keep warm in a 200°F oven if desired. Repeat with remaining batter and serve hot with maple syrup, nut butter, or preferred toppings.
Notes
- Allowing the batter to rest improves texture by hydrating the oat flour.
- If using coconut oil, ensure it is melted and slightly warm before mixing to prevent clumps.
- Do not stack waffles immediately after cooking to keep them crisp.
- Use certified gluten-free oat flour if you are sensitive to gluten.
- Storage: Waffles can be refrigerated for up to 3 days or frozen for up to 1 month.


