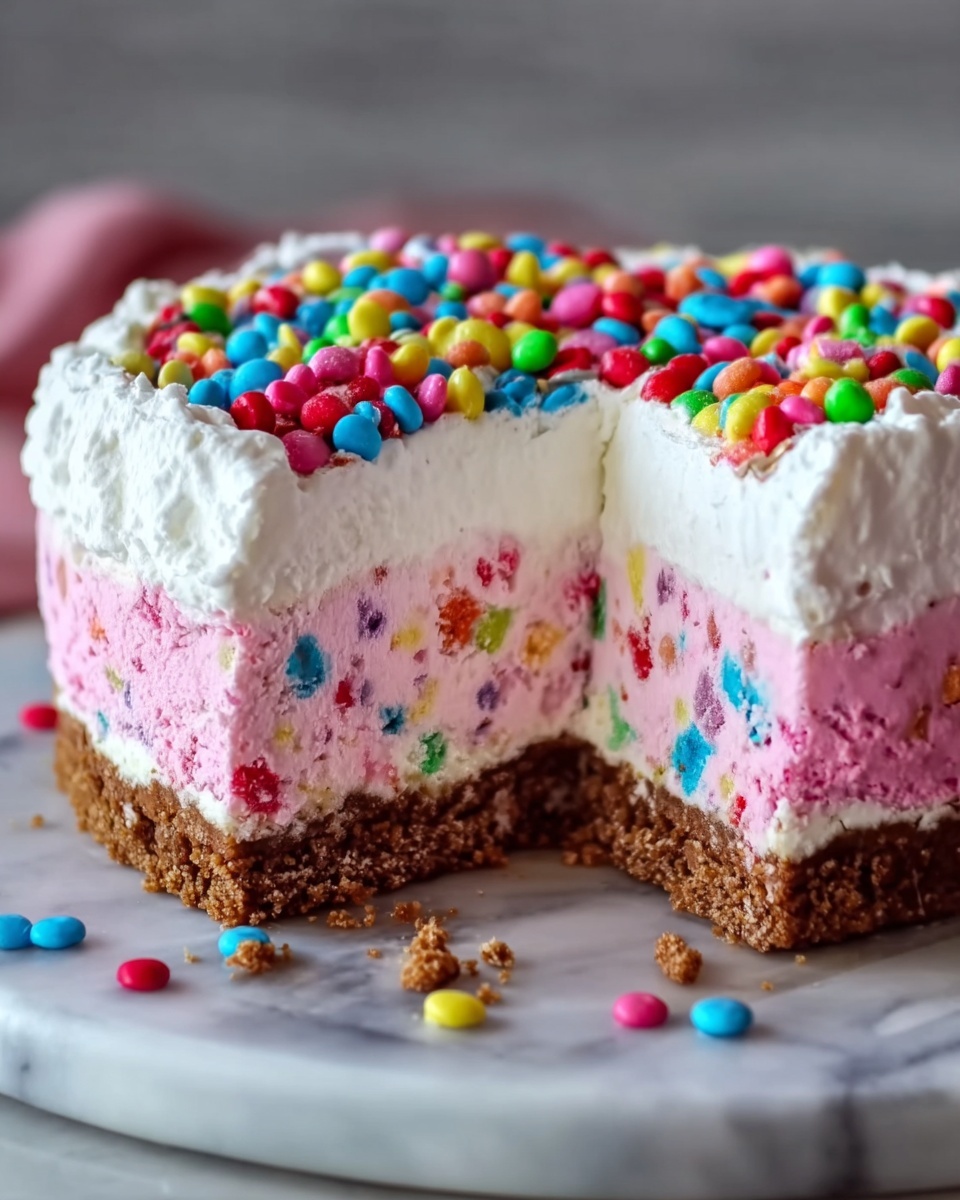
If you’re craving a dessert that’s bursting with color, flavor, and pure joy, this Funfetti Ice Cream Cake Recipe is guaranteed to brighten your day. Imagine layers of creamy strawberry ice cream swirled with vibrant rainbow sprinkles atop a chocolate cookie crumb crust, all crowned with fluffy whipped cream and more colorful candies. It’s a delightful celebration of sweetness and texture that’s perfect for birthday parties, summer treats, or any time you want to add a little whimsy to your dessert table. Trust me, once you make this cake, it will become one of your go-to showstoppers.
Ingredients You’ll Need
Gathering simple yet essential ingredients is the first step toward creating this dazzling cake. Each element plays a crucial role, from the crunchy chocolate crust that gives a rich base, to the strawberry ice cream providing fruity creaminess, and the sprinkles and candies adding bursts of fun and texture.
- Chocolate cookie crumbs: These form the crunchy and chocolatey base that contrasts beautifully with the creamy layers above.
- Melted butter: Acts as the binder to hold those cookie crumbs firmly together into a sturdy crust.
- Strawberry ice cream: The star of the cake, offering a sweet, fruity creaminess that’s irresistible.
- Whipped cream: Adds lightness and a smooth finish, creating dreamy layers throughout the cake.
- Rainbow sprinkles: These iconic sprinkles deliver pops of color and a festive vibe in every bite.
- Nerds candy (or colorful candies): Provides a fun crunch and a burst of tangy sweetness to balance the creaminess.
How to Make Funfetti Ice Cream Cake Recipe
Step 1: Prepare the delicious chocolate crust
Start by mixing the chocolate cookie crumbs with melted butter in a medium bowl. This combination creates a rich, chocolatey base that will hold together beautifully. Press the mixture firmly into the bottom of a 9-inch springform pan to form an even layer. Pop this in the freezer for 10 to 15 minutes so it sets perfectly, giving you a sturdy foundation for the rest of the cake.
Step 2: Make the creamy ice cream layer
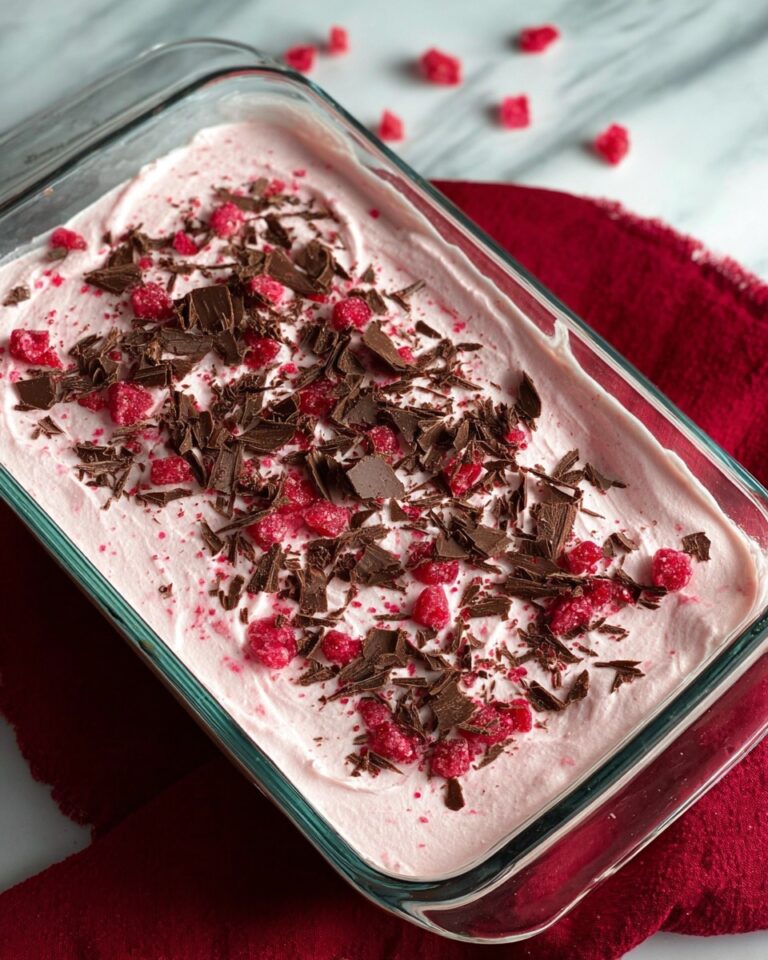
Next, soften the strawberry ice cream in a large bowl until it’s spreadable but not melted—this ensures smooth layering without losing that creamy texture. Gently fold in 1/2 cup of whipped cream and 1/2 cup of rainbow sprinkles, scattering color and crunch throughout this dreamy layer. Carefully spread the mixture evenly over your chilled crust, setting the stage for an eye-catching cake.
Step 3: Add the festive whipped cream topping
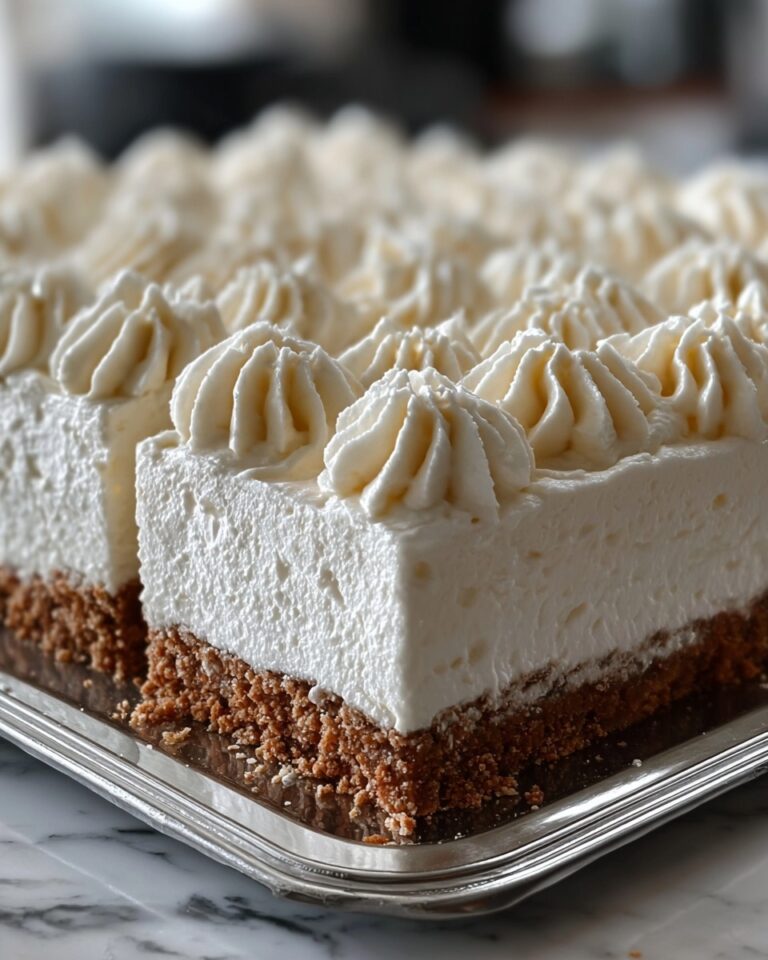
Spread the remaining whipped cream over the ice cream layer to add a luscious, fluffy finish. Top this off with extra rainbow sprinkles and Nerds candy for an extra burst of color and playful texture. These final touches transform your cake into a fun and inviting masterpiece.
Step 4: Freeze until set
Place the entire cake back into the freezer and let it chill for at least 4 hours, or until it’s completely set. This step is key to achieving sliceable, neat portions that hold their shape while maintaining that soft ice cream softness we all love.
Step 5: Serve and enjoy
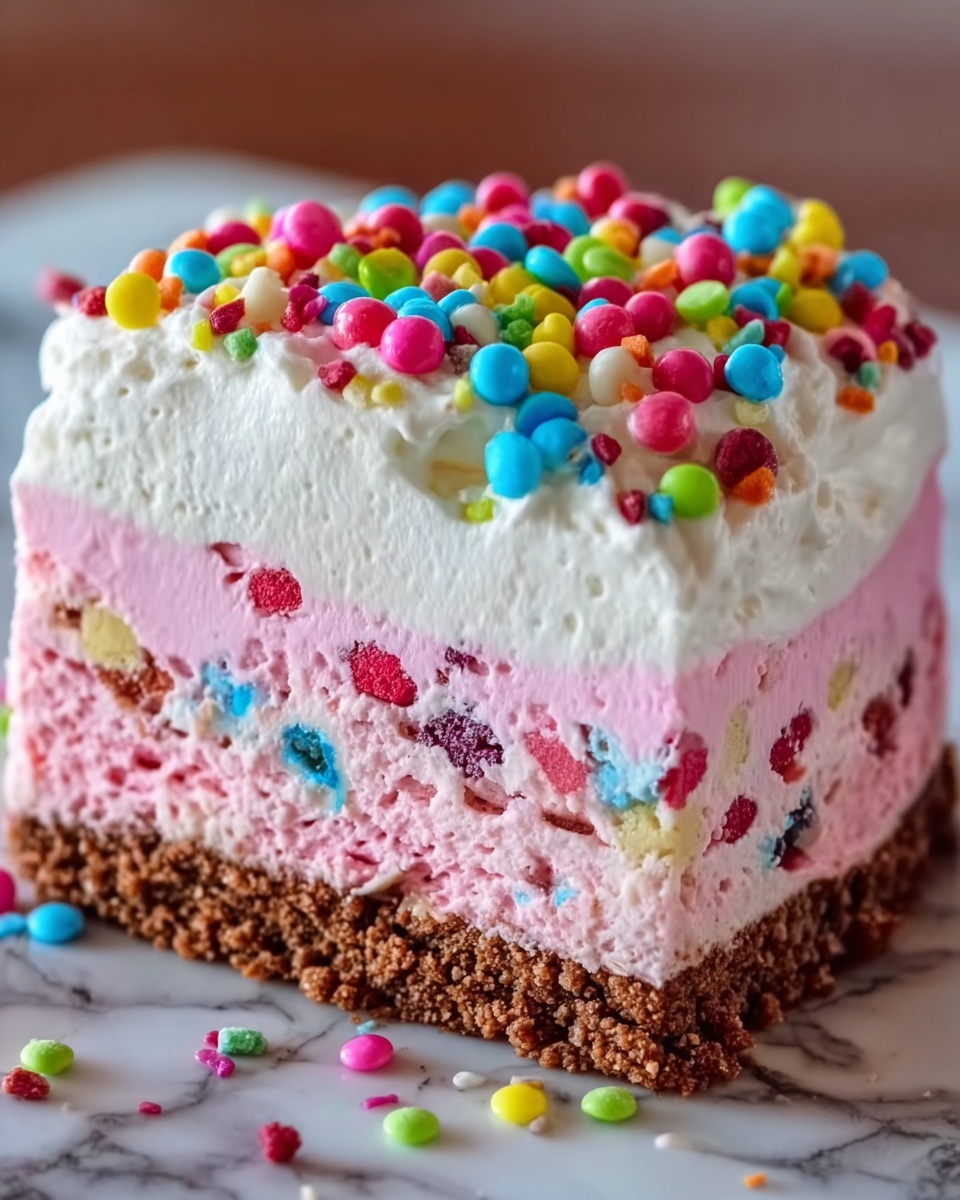
When you’re ready to indulge, carefully remove the cake from the springform pan and slice it into generous servings. Each slice is a festive blend of creamy, crunchy, sweet, and colorful happiness.
How to Serve Funfetti Ice Cream Cake Recipe

Garnishes
To amp up the presentation, sprinkle a few extra rainbow sprinkles or Nerds candy on each slice just before serving. Fresh fruit like sliced strawberries or blueberries can add a natural freshness that pairs beautifully with the sweetness. A drizzle of strawberry sauce or chocolate syrup also complements the layers wonderfully.
Side Dishes
This cake pairs wonderfully with light accompaniments like a crisp fruit salad or a simple glass of sparkling lemonade. For a grown-up twist, serve with a small scoop of rich espresso or a fruity cocktail to balance the playful flavors of the cake.
Creative Ways to Present
Consider serving this Funfetti Ice Cream Cake Recipe at a themed party with matching colorful plates and napkins to enhance the festive vibe. You can also try making individual mini versions in cups or mason jars for easy, grab-and-go servings that add a bit of charm to any gathering.
Make Ahead and Storage
Storing Leftovers
After enjoying this vibrant cake, wrap any leftovers tightly with plastic wrap or place them in an airtight container. Store the cake in the freezer to keep it fresh and maintain its perfect texture. It’s best enjoyed within a week.
Freezing
This cake is built to be frozen! Its ice cream base means it freezes beautifully without losing quality. Just make sure it’s well-covered to avoid freezer burn and to keep the colors bright for your next treat.
Reheating
Since this cake is an ice cream cake, reheating isn’t necessary. Instead, allow servings to sit at room temperature for a few minutes before slicing to get perfect slices without cracking.
FAQs
Can I use other ice cream flavors in this Funfetti Ice Cream Cake Recipe?
Absolutely! Vanilla or birthday cake-flavored ice cream would work wonderfully and still keep that festive, colorful vibe. Feel free to get creative with your favorite flavors.
What if I don’t have a springform pan?
You can use a regular cake pan lined with parchment paper for easier removal. Just be mindful that it might be a bit trickier to get the cake out in perfect shape.
Can I substitute the Nerds candy with another type?
Definitely! Any colorful candy that adds a bit of crunch and sweetness, like mini M&Ms or crushed candy canes, will work just fine with this recipe.
How long does it take to make this Funfetti Ice Cream Cake Recipe?
Active prep time is about 20 minutes, but you’ll want to allow at least 4 hours of freezing time for the cake to set properly before serving.
Is this cake suitable for kids’ parties?
Without a doubt! The vibrant colors, sweet crunch, and creamy texture make it a huge hit with kids and adults alike. It’s a playful and delicious centerpiece for any celebration.
Final Thoughts
Whipping up this Funfetti Ice Cream Cake Recipe is such a joyful experience from start to finish. It’s not just a dessert, but a celebration on your plate that’s sure to bring smiles all around. Whether you’re treating yourself or sharing with friends, this cake is guaranteed to brighten any occasion with its delightful flavors and festive charm. Give it a try and watch how quickly it becomes a beloved favorite in your kitchen!
Print
Funfetti Ice Cream Cake Recipe
- Prep Time: 20 minutes
- Cook Time: 0 minutes
- Total Time: 4 hours 20 minutes
- Yield: 8 servings
- Category: Dessert
- Method: No-Cook
- Cuisine: American
Description
A colorful and fun Funfetti Ice Cream Cake featuring a chocolate cookie crumb crust, creamy strawberry ice cream mixed with sprinkles, and a whipped cream topping adorned with rainbow sprinkles and Nerds candy. Perfect for celebrations and easy to prepare without baking.
Ingredients
Crust
- 2 cups chocolate cookie crumbs
- 1/4 cup melted butter
Ice Cream Layer
- 4 cups strawberry ice cream
- 1/2 cup whipped cream
- 1/2 cup rainbow sprinkles
Topping
- 1 cup whipped cream
- 1/4 cup extra rainbow sprinkles
- 1/4 cup Nerds candy (or your favorite colorful candies)
Instructions
- Prepare the crust: In a medium bowl, combine the chocolate cookie crumbs with melted butter until the crumbs are evenly coated. Press the mixture firmly into the bottom of a 9-inch springform pan to form an even crust. Place the crust in the freezer for 10 to 15 minutes to allow it to set and harden slightly.
- Make the ice cream layer: Soften the strawberry ice cream in a large bowl until it becomes spreadable but not melted. Gently fold in 1/2 cup of whipped cream and 1/2 cup of rainbow sprinkles to create a fun, colorful mixture. Evenly spread this mixture over the chilled chocolate cookie crust.
- Add the topping: Evenly spread the remaining 1/2 cup of whipped cream over the ice cream layer to create a smooth topping. Sprinkle the top with the extra 1/4 cup of rainbow sprinkles and 1/4 cup of Nerds candy or your preferred colorful candies for added texture and visual appeal.
- Freeze the cake: Place the cake back into the freezer and freeze for at least 4 hours, or until the ice cream is completely set and firm enough to slice.
- Serve: Remove the sides of the springform pan carefully. Slice the cake into 8 servings and enjoy immediately for a refreshing, festive dessert experience.
Notes
- Ensure the strawberry ice cream is softened but not melted to make spreading easier without losing the cake’s shape.
- Use a springform pan for easy removal of the cake without damage.
- Feel free to substitute the Nerds candy with other colorful candies like M&Ms or mini chocolate chips.
- For best texture, do not skip the initial chilling of the crust before adding the ice cream layer.
- Let the cake sit at room temperature for a few minutes before slicing if it’s too hard to cut.


