“`html
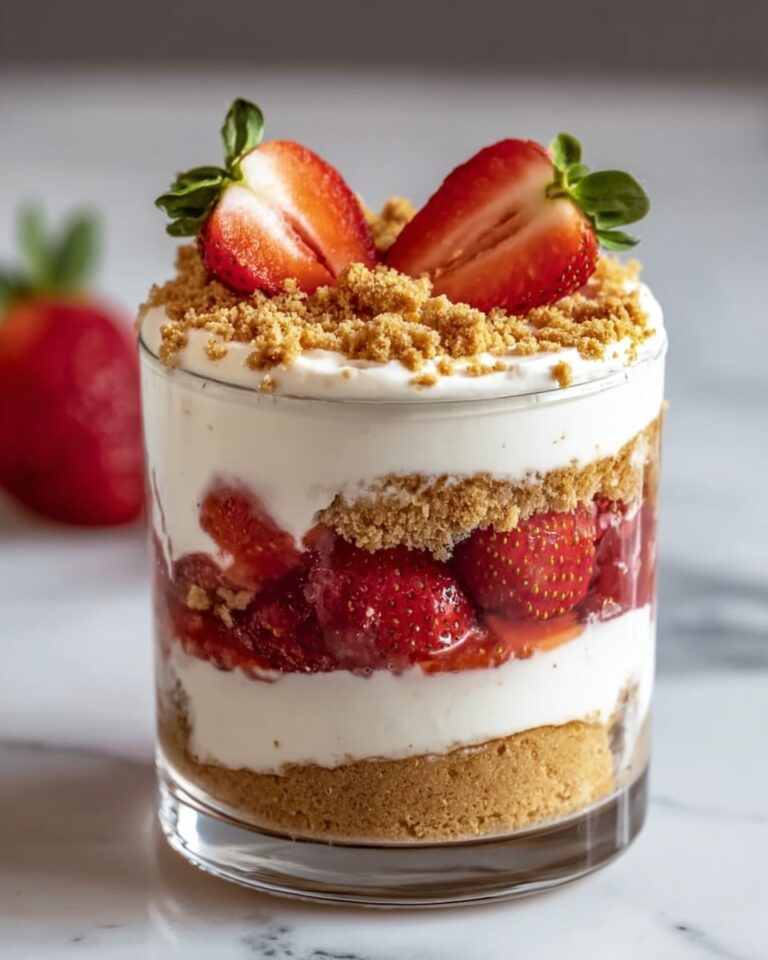
There’s something truly magical about a dessert that feels indulgent yet keeps your nutrition goals in check, and this High-Protein Cheesecake Jars Recipe hits that sweet spot perfectly. These jars combine the creamy richness of classic cheesecake with a boost of protein from Greek yogurt and protein powder, all layered over a buttery graham cracker crust. Easy to make, portable, and utterly delicious, they’re perfect for a guilt-free treat any time of day. Whether you need a post-workout snack or a cozy dessert, this recipe brings serious joy to your taste buds and your body.
Ingredients You’ll Need
Getting started with this High-Protein Cheesecake Jars Recipe is refreshingly simple because every ingredient contributes its own special touch, from texture to flavor and even that pretty final look. Together, they make a balance of creamy, crunchy, sweet, and tangy that just works.
- 1 cup Greek yogurt (non-fat or low-fat): Adds creaminess and a healthy protein punch while keeping things light.
- 8 oz cream cheese, softened: The star that gives cheesecake its signature creamy and rich texture.
- 1/4 cup protein powder (vanilla or unflavored): Boosts the protein content without overpowering the flavor, keeping these jars satisfying.
- 1/4 cup honey or maple syrup: Natural sweetness that complements the tang of yogurt and cream cheese perfectly.
- 1 tsp vanilla extract: A little splash that elevates all the flavors with a warm, comforting aroma.
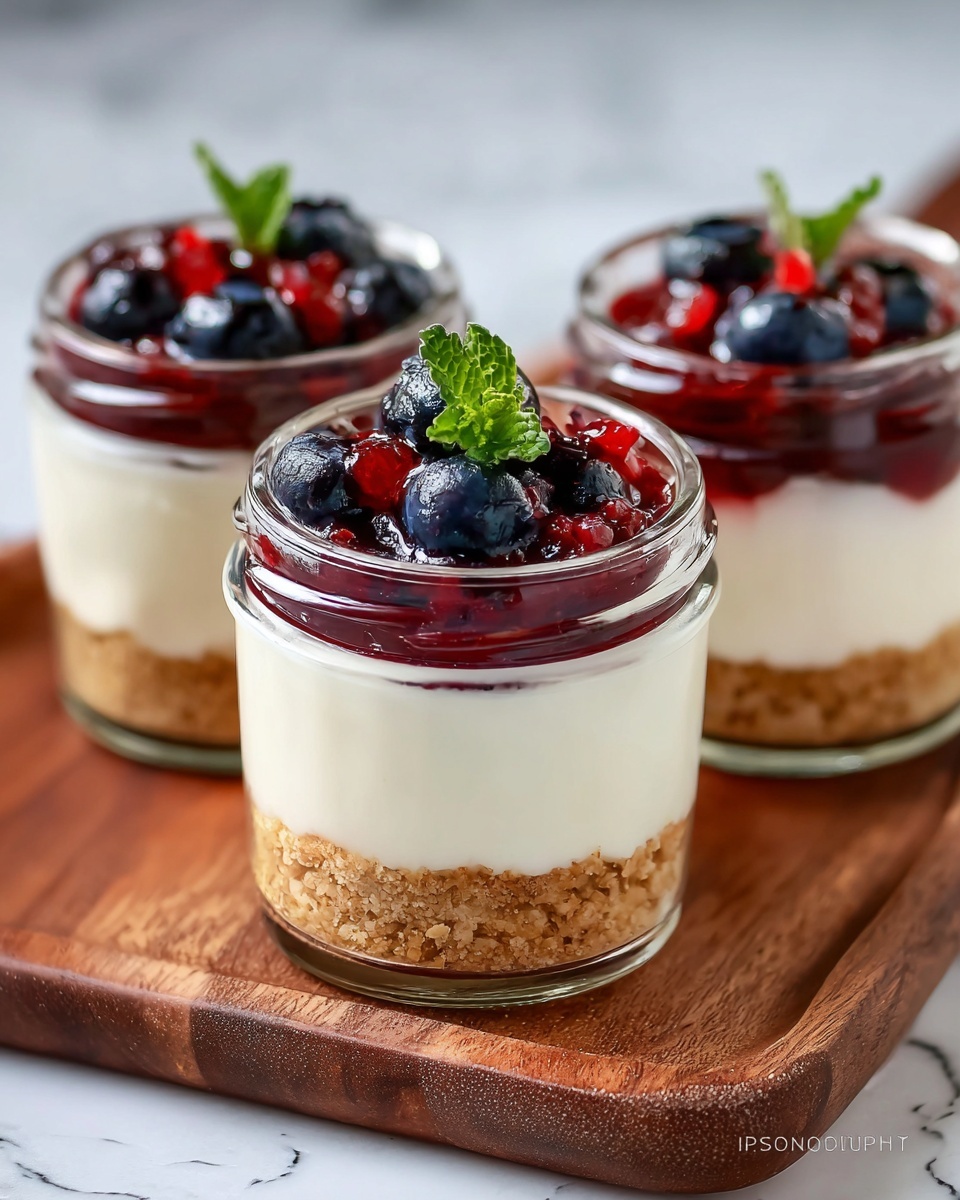
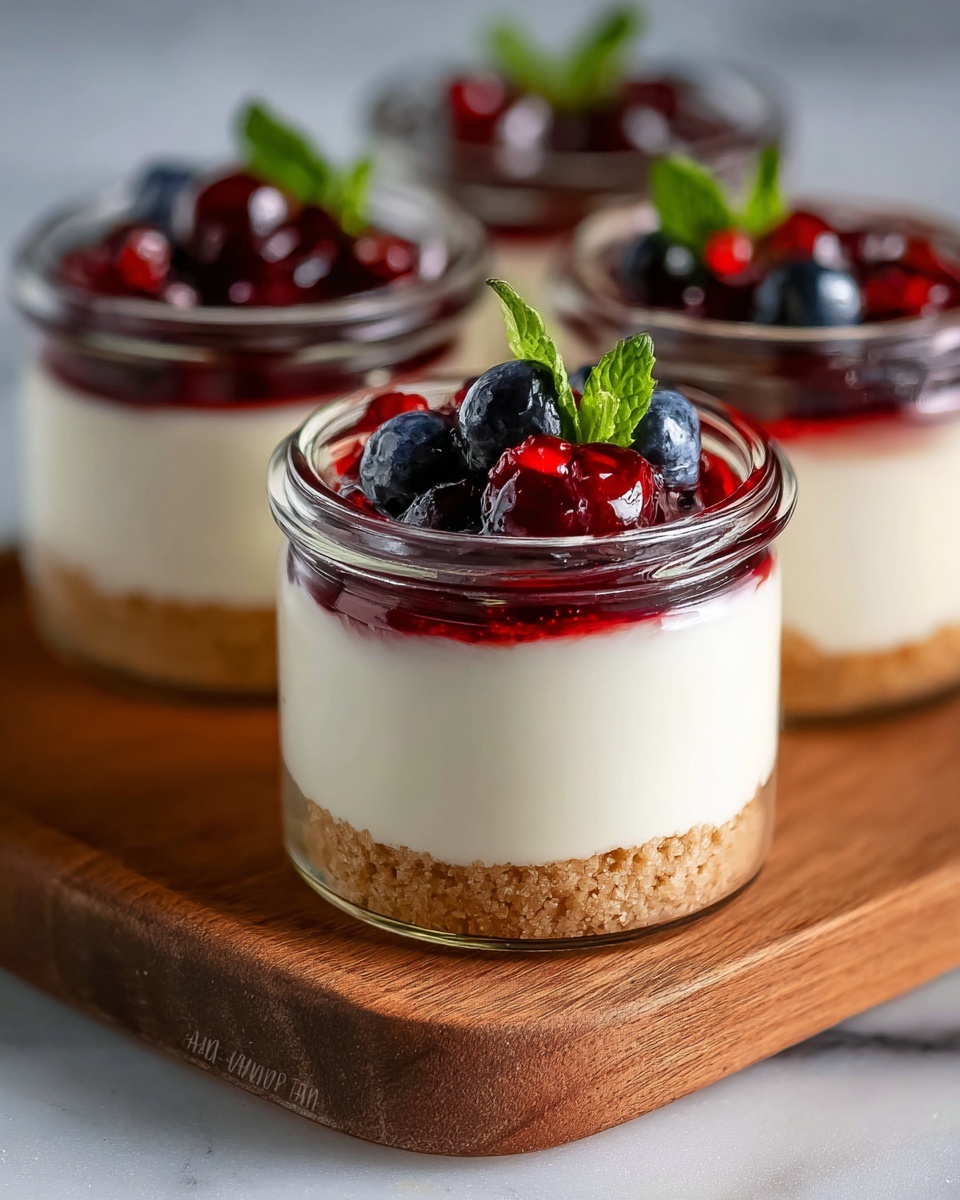
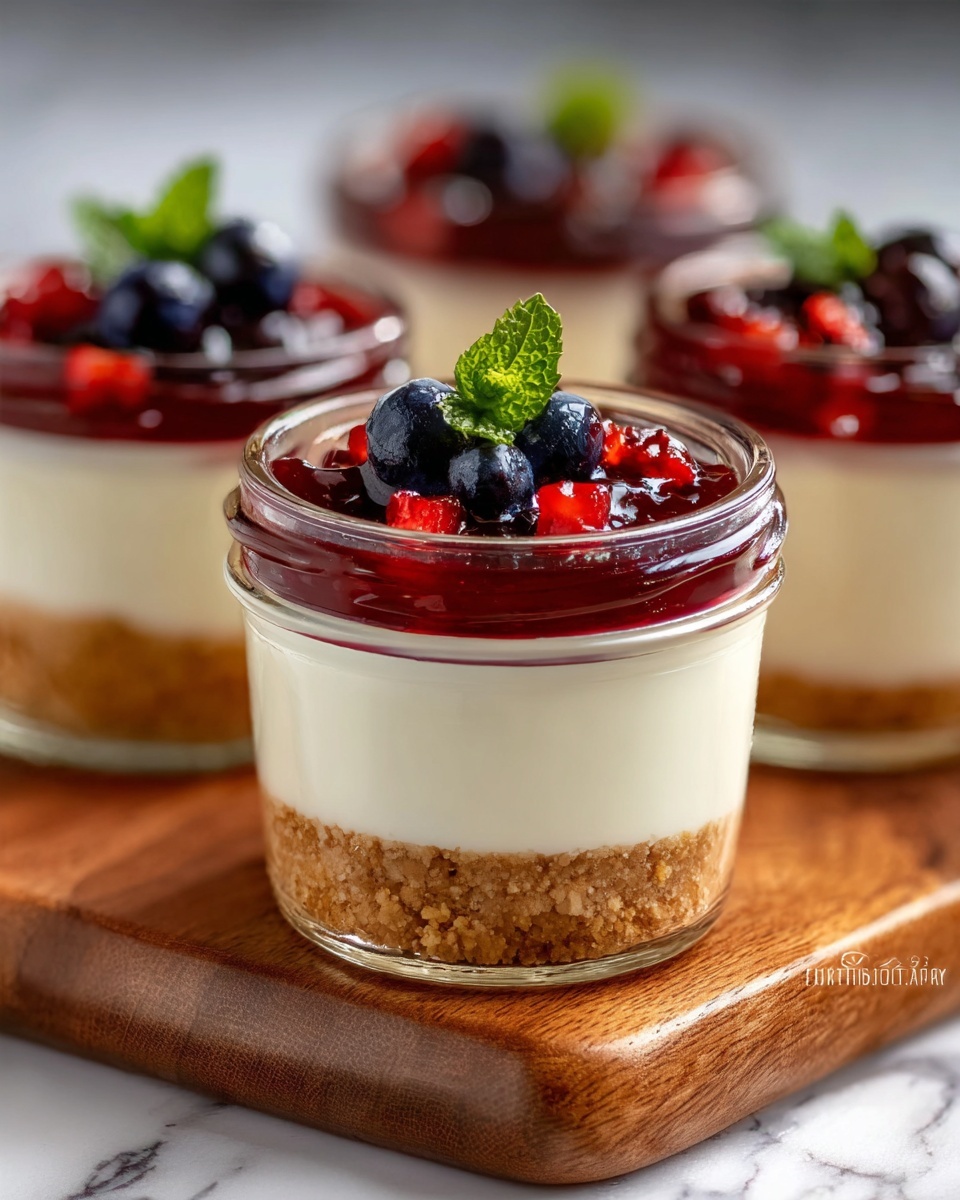
- 1 cup crushed graham crackers: Provides a buttery, crunchy base that contrasts beautifully with the smooth filling.
- 2 tbsp melted butter: Binds the graham cracker crust while adding richness.
- Optional: fresh berries or fruit topping: Adds a juicy, colorful pop of freshness right before serving.
How to Make High-Protein Cheesecake Jars Recipe
Step 1: Prepare the Graham Cracker Crust
The foundation of this dessert is crucial. Start by mixing the crushed graham crackers with the melted butter until every crumb is coated and slightly clumpy. Press this mixture firmly into the bottom of your serving jars. This creates a sturdy, buttery bed that will hold all that delicious cheesecake filling with just the right crunch every time.
Step 2: Soften the Cream Cheese
Next, beat the softened cream cheese in a medium bowl until it’s silky smooth and free of lumps. Taking the time to do this ensures the filling’s texture is perfectly creamy without any gritty bits, giving you that luscious mouthfeel you expect from a great cheesecake.
Step 3: Combine the Filling Ingredients
Now comes the fun part—adding in the Greek yogurt, protein powder, honey or maple syrup, and vanilla extract to the cream cheese. Mix everything thoroughly until the mixture is velvety and consistent. It might look thick at first, but that’s exactly what you want—it means it will set nicely.
Step 4: Fill the Jars
Divide the creamy cheesecake mixture evenly on top of the graham cracker crust in each jar. Aim for a smooth top so your dessert looks as good as it tastes. Filling jars individually also makes portion control a breeze and adds a charming, personal touch if you’re serving guests.
Step 5: Chill to Set
Refrigerate your jars for at least 2 hours or even overnight if you have the patience. This chilling time lets the flavors meld beautifully and allows the cheesecake to firm up to the perfect spoonable consistency. It’s worth the wait, trust me!
Step 6: Add Toppings
Just before serving, top your jars with fresh berries or slices of your favorite fruit. These toppings add a burst of color, freshness, and natural sweetness that complement the rich cheesecake like a dream.
How to Serve High-Protein Cheesecake Jars Recipe
Garnishes
Fresh berries such as raspberries, blueberries, or sliced strawberries are fantastic when paired with these jars. You can also sprinkle a little cinnamon or finely chopped nuts for added texture and flavor. A small mint leaf on top can brighten the whole presentation, making each jar feel like a celebration.
Side Dishes
If you’re serving this High-Protein Cheesecake Jars Recipe as part of a larger dessert spread, consider pairing it with light accompaniments like a crisp green salad or a slice of citrus fruit. These sides balance the richness with refreshing contrasts, helping your palate stay engaged meal after meal.
Creative Ways to Present
Try layering the cheesecake jars with alternating fruit compotes or a drizzle of dark chocolate sauce between the crust and filling to add surprises in each bite. Using clear mason jars highlights the beautiful layers and makes for a charming gift idea that friends and family will adore.
Make Ahead and Storage
Storing Leftovers
These cheesecake jars keep beautifully in the refrigerator for up to 3 days when covered tightly. Keeping them chilled ensures the texture stays firm and refreshing, making it easy to grab a ready-made protein-packed dessert or snack anytime.
Freezing
You can freeze the jars if you want to prep ahead. To do this, place a piece of plastic wrap directly on the surface of the cheesecake before sealing the jar lid. Frozen jars last up to 1 month, and though the texture may be slightly different after thawing, they remain delicious and convenient.
Reheating
Since this is a no-bake, chilled dessert, reheating isn’t necessary or recommended. Instead, just thaw frozen jars in the fridge overnight and enjoy cold for the best texture and flavor experience.
FAQs
Can I use flavored protein powder?
Absolutely! Vanilla is the most neutral and blends well, but using flavored protein powders like chocolate or strawberry can add a fun twist to the jars. Just keep in mind it will impact the overall flavor.
What’s the best type of Greek yogurt to use?
Non-fat or low-fat Greek yogurt works best as it keeps the cheesecake light but still creamy. Whole milk Greek yogurt can be used for a richer texture if preferred.
Can I make this recipe dairy-free?
Yes, swapping the cream cheese with a dairy-free alternative and using plant-based Greek-style yogurt will work, although the texture might be slightly different but still tasty.
Is it necessary to refrigerate for overnight?
While 2 hours is the minimum to set the jars properly, overnight refrigeration allows flavors to meld deeply and the texture to become even creamier and more cohesive.
Can I add other mix-ins to the cheesecake filling?
Definitely! Chopped nuts, dark chocolate chips, or even a swirl of peanut butter can be folded in to make the jars uniquely your own and add exciting textures.
Final Thoughts
Making these High-Protein Cheesecake Jars Recipe is such a joyful way to enjoy a classic dessert with a nutritious boost. They’re simple to assemble, delightfully creamy, and perfect for anyone craving something sweet without the guilt. I can’t wait for you to try this recipe and discover how effortlessly delicious and versatile it can be in your daily routine!
“`
Print
High-Protein Cheesecake Jars Recipe
- Prep Time: 15 minutes
- Cook Time: 0 minutes
- Total Time: 2 hours 15 minutes
- Yield: 4 servings
- Category: Dessert
- Method: No-Cook
- Cuisine: American
- Diet: Low Fat
Description
These High-Protein Cheesecake Jars offer a creamy, delicious dessert that’s packed with protein and perfect for a nutritious snack or treat. Made with Greek yogurt, cream cheese, and protein powder, they combine the classic flavors of cheesecake with a healthy twist, all conveniently served in individual jars.
Ingredients
Crust
- 1 cup crushed graham crackers
- 2 tbsp melted butter
Cheesecake Filling
- 8 oz cream cheese, softened
- 1 cup Greek yogurt (non-fat or low-fat)
- 1/4 cup protein powder (vanilla or unflavored)
- 1/4 cup honey or maple syrup
- 1 tsp vanilla extract
Topping (Optional)
- Fresh berries or fruit topping
Instructions
- Prepare the Crust: In a small bowl, combine the crushed graham crackers with the melted butter until well mixed. Press this mixture firmly into the bottom of each serving jar to form an even crust layer.
- Beat Cream Cheese: In a separate bowl, beat the softened cream cheese until smooth and creamy, ensuring there are no lumps for a silky texture.
- Mix Filling Ingredients: Add the Greek yogurt, protein powder, honey (or maple syrup), and vanilla extract to the cream cheese. Mix thoroughly until the mixture is creamy and all ingredients are well incorporated.
- Assemble the Jars: Evenly divide the cheesecake filling over the graham cracker crust in each jar, spreading it smoothly to cover the crust layer completely.
- Chill to Set: Place the jars in the refrigerator and chill for at least 2 hours or overnight to allow the cheesecake mixture to set firmly.
- Add Toppings and Serve: Before serving, optionally top each jar with fresh berries or your preferred fruit topping for added flavor and freshness.
Notes
- You can substitute honey with maple syrup for a vegan-friendly option.
- Use vanilla or unflavored protein powder depending on your flavor preference.
- These jars should be stored in the refrigerator and consumed within 2-3 days for best freshness.
- To make a dairy-free version, consider using dairy-free cream cheese and yogurt alternatives.

