
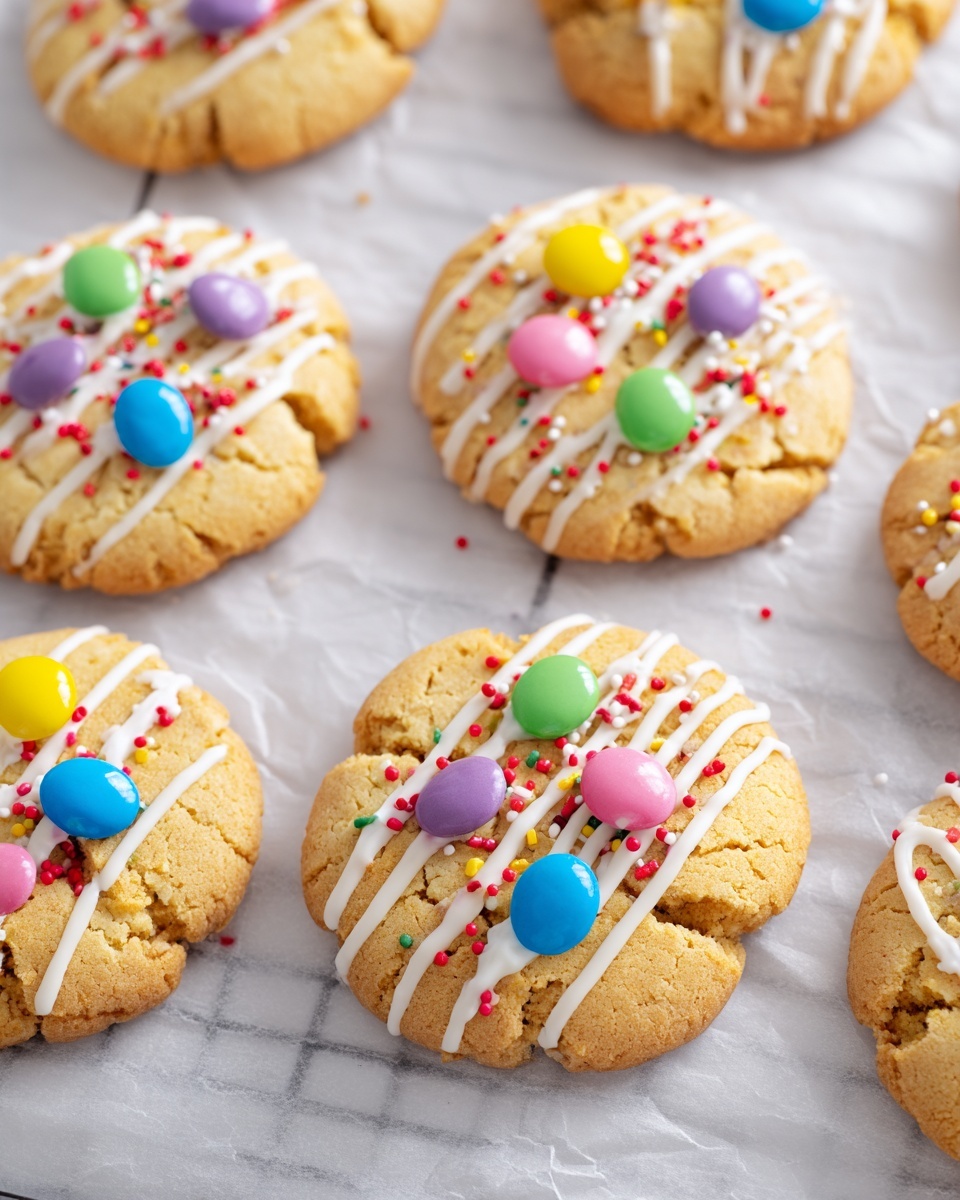
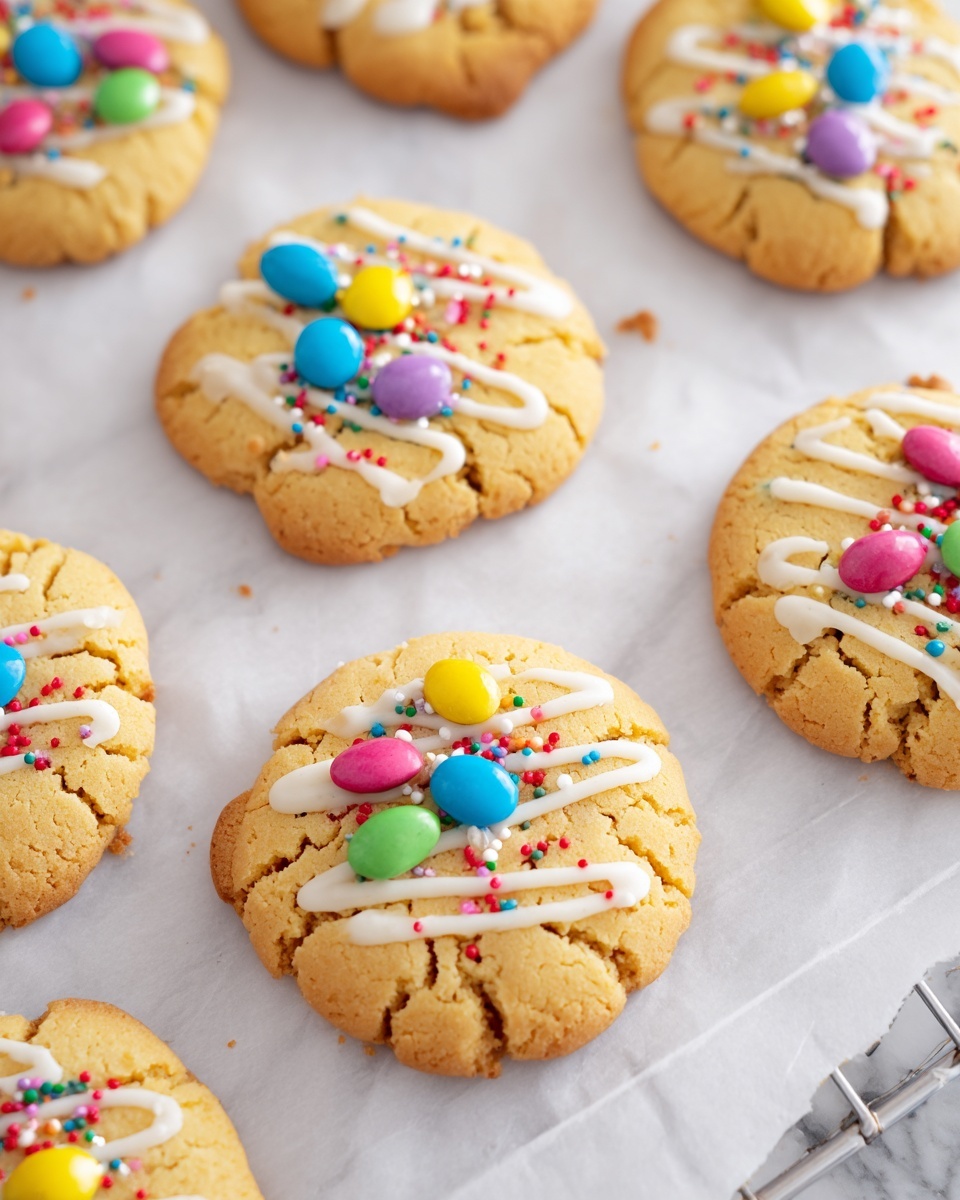
If you’re looking for a delightful treat that combines buttery richness with playful pops of color and candy crunch, this Pastel Candy-Centered Butter Cookies Recipe is going to become your absolute favorite. These cookies are a perfect balance of tender, melt-in-your-mouth dough and sweet pastel candies nestled right in the center, creating moments of joyful surprise with every bite. Whether you’re baking for a festive occasion, a cozy afternoon snack, or just because, these cookies bring warmth and happiness to any table.
Ingredients You’ll Need
The magic of this Pastel Candy-Centered Butter Cookies Recipe lies in the simplicity of its ingredients. Each one plays a crucial role, from the creamy butter that gives the cookies their tender texture to the pastel-colored candies that add bursts of color and sweetness.
- 1 cup unsalted butter, softened: Softened butter ensures a smooth, creamy dough and rich flavor.
- 3/4 cup granulated sugar: Adds sweetness and helps create that slight crisp edge on the cookies.
- 1 large egg: Binds the ingredients and adds moisture for a tender crumb.
- 1 teaspoon vanilla extract: Enhances the overall flavor with warm, comforting notes.
- 2 cups all-purpose flour: The foundation of the dough, providing structure and stability.
- 1/2 teaspoon salt: Balances the sweetness and intensifies the buttery taste.
- 1/2 teaspoon baking powder: Helps the cookies rise just enough without losing their chewy texture.
- 1/2 cup pastel-colored candy-coated chocolates: The star attraction, offering vibrant color and a delightful crunch in every cookie.
How to Make Pastel Candy-Centered Butter Cookies Recipe
Step 1: Prepare Your Oven and Baking Sheet
Start by preheating your oven to 350°F (175°C) and lining a baking sheet with parchment paper. This step ensures even baking and that your cookies won’t stick, making for easy cleanup and perfect shapes.
Step 2: Cream Butter and Sugar
In a large bowl, beat the softened butter and granulated sugar together until the mixture is light and fluffy. This process incorporates air, which helps yield tender, airy cookies.
Step 3: Add Egg and Vanilla
Mix in the egg and vanilla extract until fully combined. These ingredients add richness and that signature sweet aroma that will fill your kitchen.
Step 4: Combine Dry Ingredients
In a separate bowl, whisk together the flour, salt, and baking powder. This step evenly distributes the leavening agent and salt for consistent texture and flavor.
Step 5: Form the Dough
Gradually add the dry ingredients to the butter mixture, mixing until a soft dough forms. Avoid over-mixing to keep those cookies tender.
Step 6: Shape the Cookies
Roll tablespoon-sized portions of dough into balls and place them on the prepared baking sheet, spacing them about two inches apart. This allows room for spreading.
Step 7: Add the Pastel Candy Center
Gently press a few pastel candies into the top of each dough ball. These candies will melt slightly when baked, creating vibrant centers with delightful bites of chocolate.
Step 8: Bake to Perfection
Bake the cookies for 10 to 12 minutes, or until the edges are lightly golden. Watch closely as these beauties can quickly go from perfectly baked to overdone.
Step 9: Cool and Enjoy
Let the cookies cool on the baking sheet for five minutes before transferring to a wire rack to cool completely. This resting time helps them set and makes them easier to handle.
How to Serve Pastel Candy-Centered Butter Cookies Recipe
Garnishes
While these cookies speak charm on their own, a light dusting of powdered sugar or a drizzle of white chocolate can add a lovely touch. Sprinkling a few extra pastel candies on top just before serving ups the cuteness factor and invites smiles all around.
Side Dishes
Pair your pastel candy-centered cookies with a glass of cold milk, a comforting cup of tea, or a cappuccino for a cozy treat. For a more indulgent spread, serve alongside fresh fruit or a scoop of vanilla ice cream.
Creative Ways to Present
Turn these cookies into an eye-catching gift by stacking them in a decorative tin or wrapping them up with colorful ribbons. You can also arrange them on a pastel-themed dessert platter for parties, creating a playful and inviting display that’s perfect for spring gatherings or celebrations.
Make Ahead and Storage
Storing Leftovers
Once cooled, store any leftover cookies in an airtight container at room temperature. They’ll stay fresh and delicious for up to one week, making them an ideal make-ahead treat for busy days.
Freezing
If you want to keep these cookies around longer, freeze them in a single layer on a baking sheet before transferring to a freezer bag or container. When sealed properly, they maintain their flavor and texture for up to three months.
Reheating
To enjoy frozen cookies at their best, thaw them at room temperature. If you like a slightly warm cookie, pop one in the microwave for about 10 seconds or heat in a preheated oven at 300°F for a few minutes for freshly baked vibes.
FAQs
Can I use different types of candies for this recipe?
Absolutely! While pastel-colored candy-coated chocolates are perfect, you can experiment with other small candies or even mini chocolate chips to suit your taste and occasion.
Are these cookies suitable for kids to help make?
Yes! The dough is easy to handle, and pressing the pastel candies on top is a fun activity for little hands, making it a delightful baking project to enjoy with kids.
Can I make this recipe gluten-free?
To make the cookies gluten-free, swap the all-purpose flour for a gluten-free baking blend. Just keep in mind that texture may vary slightly, but the cookies will still be delicious.
What’s the best way to prevent the candies from melting too much?
Press the candies gently on top rather than mixing them into the dough, and bake the cookies just until the edges are golden. This helps keep the candies intact with minimal melting.
How long do these cookies stay fresh?
Stored in an airtight container at room temperature, these cookies stay fresh and tasty for about a week, perfect for enjoying over several days or sharing with friends.
Final Thoughts
This Pastel Candy-Centered Butter Cookies Recipe isn’t just a cookie; it’s a joyful little celebration of color, texture, and comfort all wrapped into one. Once you try these, you’ll find it hard to stop at just one, and they’re sure to brighten up any occasion. So go ahead, bake a batch, share with loved ones, and watch how quickly these pretty little cookies disappear!
Print
Pastel Candy-Centered Butter Cookies Recipe
- Prep Time: 10 minutes
- Cook Time: 12 minutes
- Total Time: 22 minutes
- Yield: 24 cookies
- Category: Dessert
- Method: Baking
- Cuisine: American
- Diet: Vegetarian
Description
Delightfully colorful and buttery, these Pastel Candy-Centered Butter Cookies are a festive treat featuring a soft, tender cookie base packed with pastel-colored candy-coated chocolates. Perfect for celebrations or an everyday sweet snack, these cookies combine classic buttery flavors with a playful pop of pastel candy on top.
Ingredients
Cookie Dough
- 1 cup unsalted butter, softened
- 3/4 cup granulated sugar
- 1 large egg
- 1 teaspoon vanilla extract
- 2 cups all-purpose flour
- 1/2 teaspoon salt
- 1/2 teaspoon baking powder
Decoration
- 1/2 cup pastel-colored candy-coated chocolates (such as M&Ms or similar)
Instructions
- Preheat Oven: Preheat your oven to 350°F (175°C) and line a baking sheet with parchment paper to prevent sticking and ensure even baking.
- Cream Butter and Sugar: In a large mixing bowl, use a hand or stand mixer to cream together the softened butter and granulated sugar until the mixture is light, fluffy, and pale in color, which ensures a tender texture in the cookies.
- Add Egg and Vanilla: Beat in the egg and vanilla extract to the creamed mixture until fully incorporated, creating a smooth and uniform batter.
- Mix Dry Ingredients: In a separate bowl, whisk together the all-purpose flour, salt, and baking powder to evenly distribute the leavening agents and salt.
- Combine Wet and Dry: Gradually add the dry ingredients to the wet ingredients, mixing just until a soft dough forms, being careful not to overmix to keep cookies tender.
- Shape Dough Balls: Scoop and roll tablespoon-sized portions of the dough into balls, then place them on the prepared baking sheet spaced about 2 inches apart to allow for spreading.
- Press Candies: Gently press a few pastel-colored candy-coated chocolates into the top of each dough ball to adorn the cookies with colorful centers.
- Bake Cookies: Bake the cookies in the preheated oven for 10-12 minutes, or until the edges are lightly golden but the centers remain soft.
- Cool Cookies: Let the cookies cool on the baking sheet for about 5 minutes to set before transferring them to a wire rack to cool completely, which helps maintain their shape and texture.
Notes
- Use room temperature butter for easier creaming and better cookie texture.
- Do not overmix the dough once flour is added to avoid tough cookies.
- If pastel candy melts during baking, gently press more candies onto the warm cookies immediately after removing from the oven.
- Store cookies in an airtight container at room temperature for up to 5 days.
- For a gluten-free version, substitute all-purpose flour with a gluten-free flour blend.
- These cookies can also be frozen before baking; thaw slightly before baking as directed.

